Remote Video Astronomy
Practical solutions to questions when using video assisted Astronomy remotely
  • Home
  • RVA
  • Start Simple
  • Learn More
  • Expand
  • Downloads
  • Blog

Five mistakes I made the last night at the ECVAR Star Party

9/20/2015

0 Comments

 
It’s good to learn from your mistakes.  Even better is to learn from someone else's mistakes.  So I thought I would note the mistakes I made the last night at ECVAR to hopefully help others avoid them.  This is sort of like an engineer's confession.  I'll claim it was because we had such a good week of viewing that I was really tired the last night.

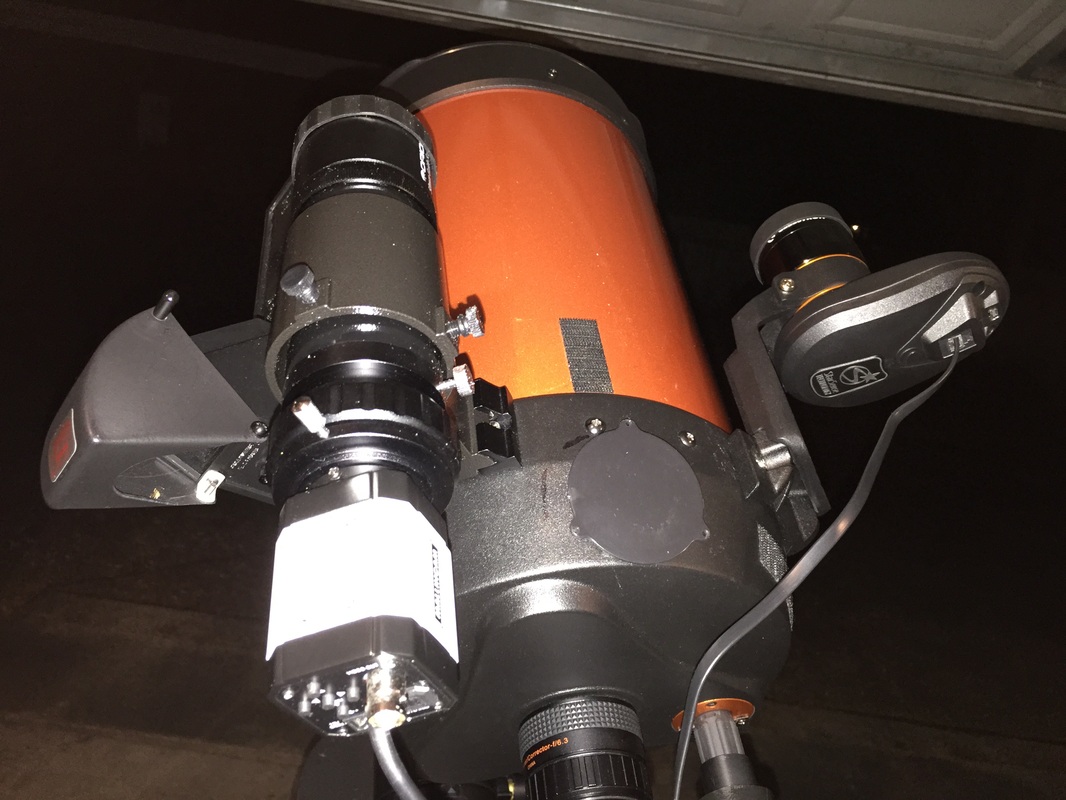
Anyway, here is my list.   Some of you might be able to relate to some of these items. I was using my CG-5 Equatorial mount with my 8" Celestron and the SkyRaider DSc camera.  Let me say up front that none of the problems were due to the equipment. It was strictly pilot cockpit error on my part.

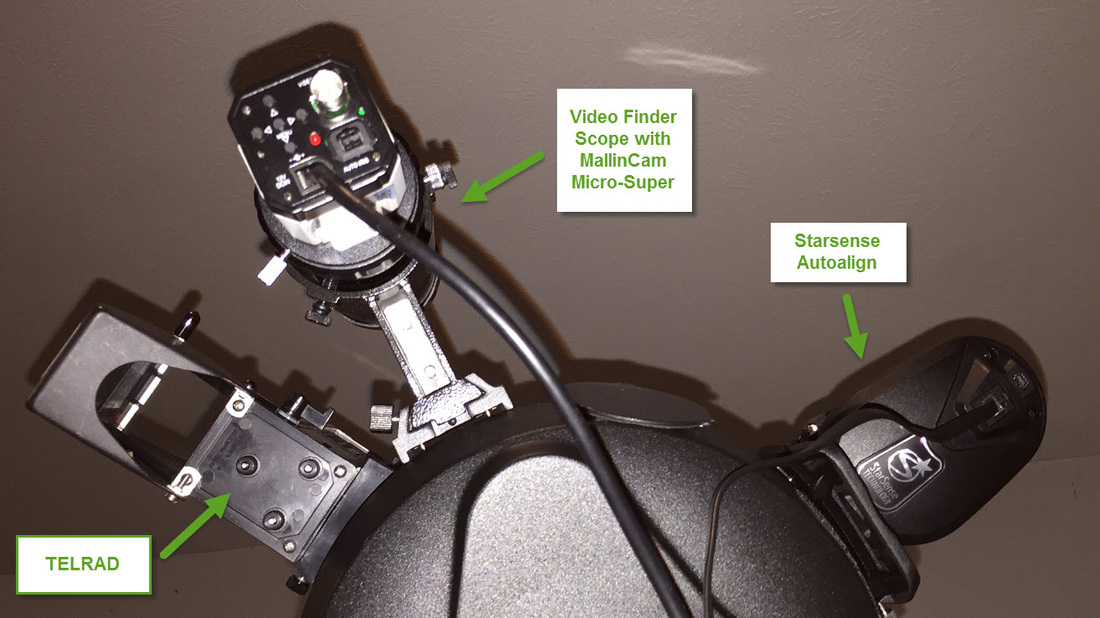
1.  I started my StarSense AutoAlign, and immediately saw the message “Too few stars” after the first acquired image.  I looked up. Yep, the stars were still there.  Then I realized I forgot to take the lens cap off the StarSense camera.  Duh.

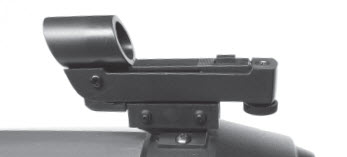
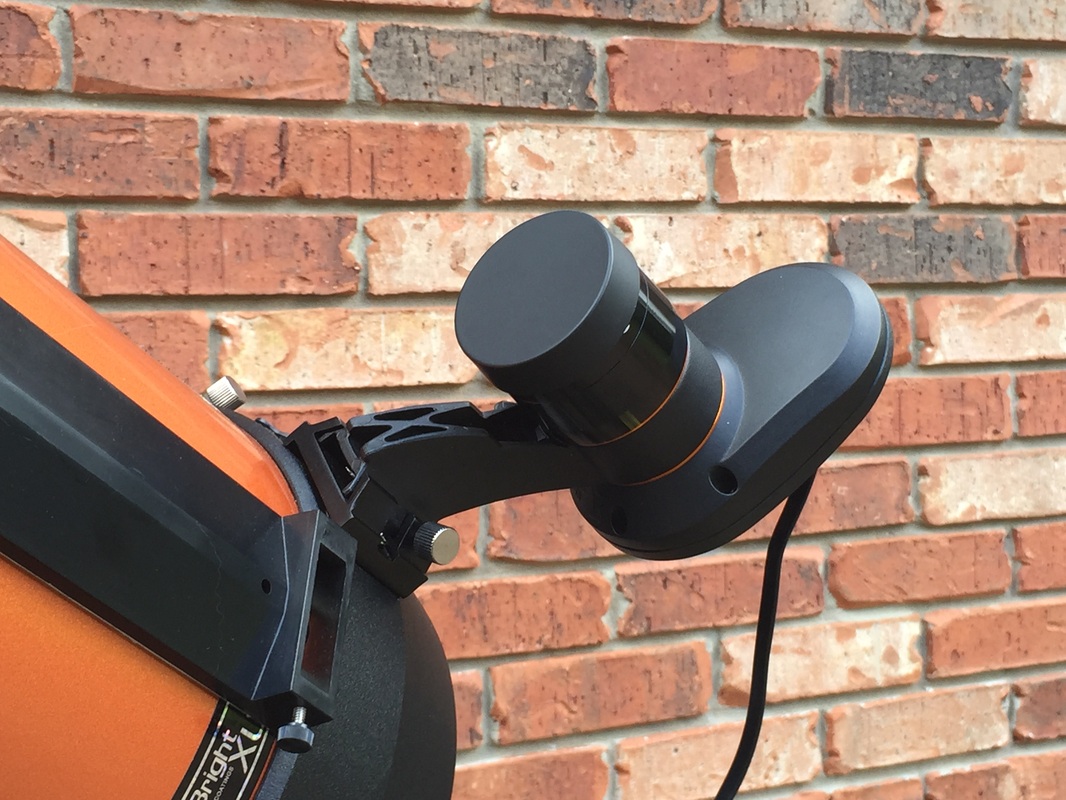
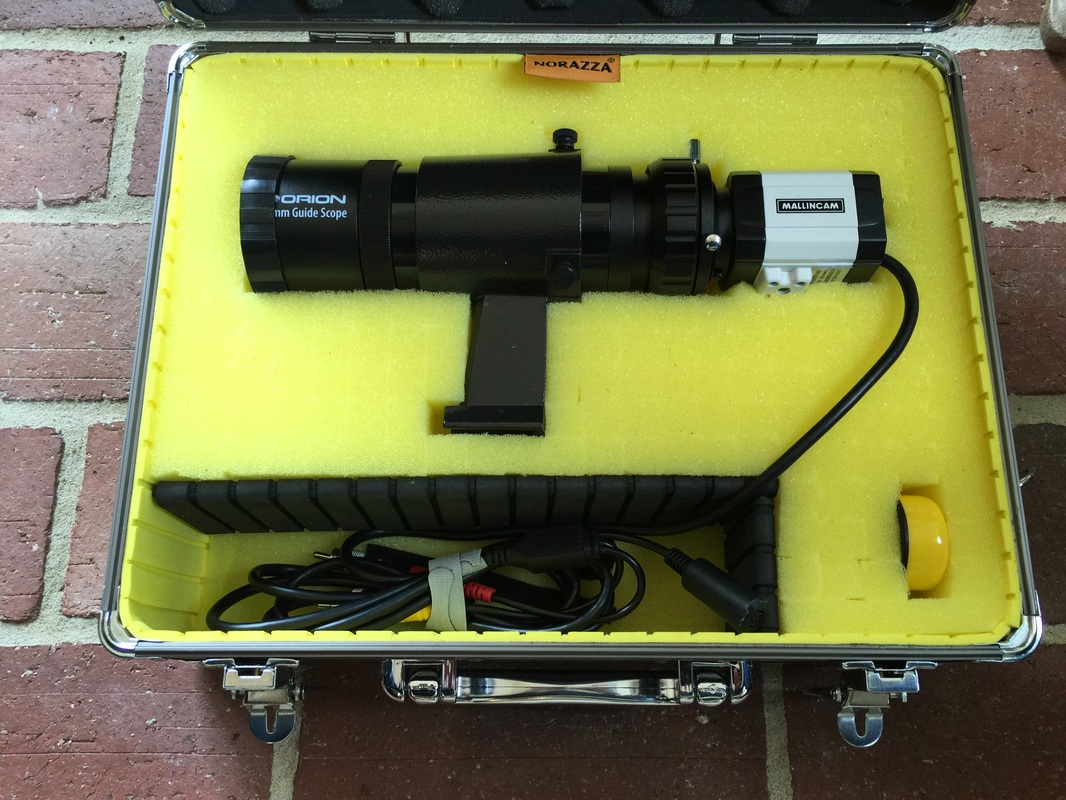
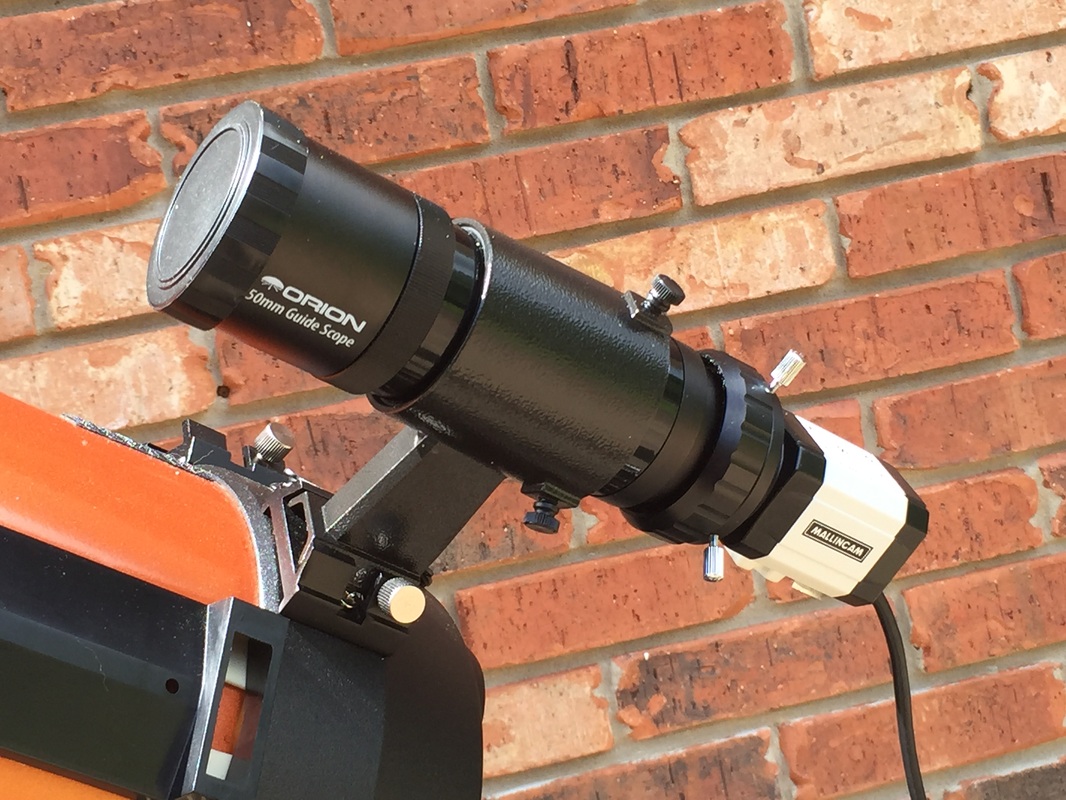
2.  I took the lens cap off the StarSense, slewed to Home Position and started an AutoAlign again.  Part way through I noticed something looked odd at my video finder scope.  The MC Micro that was supposed to be in the 50mm finder scope was not there.  It was swinging back and forth on its cable from the strain release!!  I stopped the alignment and inspected the Micro.  It had not hit anything and fortunately was OK.  Evidently I didn't tighten the screws down quite enough after focusing it earlier in the week and somehow it had worked itself loose.  As I was putting it back into the finder scope I made a mental note to do a quick check of all screws, etc. at the beginning of each evening. 

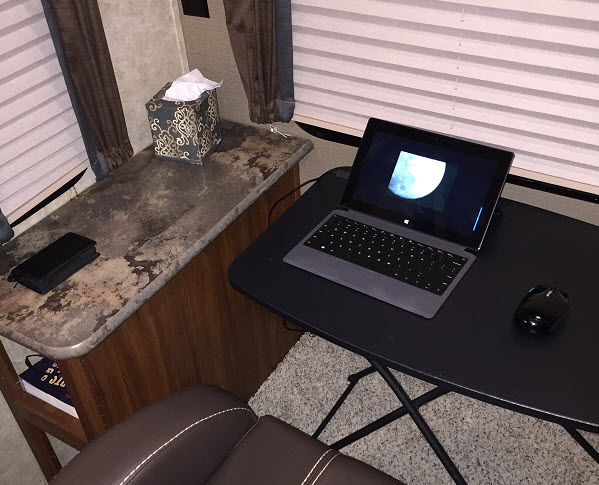
3.  So I slewed back to Home Position and started my AutoAlign again!  As it went through its paces, I noticed the mount seemed to be moving very slowly at times and the alignment failed.  This was really odd.  The StarSense was seeing plenty of stars.  Then it hit me what was wrong.  I had initially set up my CG-5 mount and 8" telescope with the MallinCam X2 early in the week.  This night I swapped the X2 out with my SkyRaider DSc. The X2 plus its fans and cables put more weight on the mount than the DSc camera with its single USB cable. So I checked and found my setup was out of balance and it put a real strain on some of the slews.  I stopped, adjusted my weights, and moved my telescope position a little on the mount until all was balanced properly for the DSc camera, and was ready to try again.

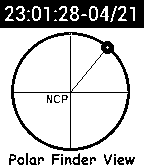
4.  So I went back to Home Position and started my AutoAlign yet again.  It finished OK like it almost always does, so I selected Polar Align on the hand controller to check how much Polar Align error it indicated.  The first night I had used my polar scope to do a rough polar align, then did an AutoAlign followed by a StarSense Polar Align to fine tune my equatorial mount's Polar Align position. At the end of each night I went back to home and selected Hibernate on my CG-5 mount. At the beginning of an evening I just turned it on and accepted the prompt to take it out of hibernate mode and was ready to go.  Now you might be wondering why I just didn't take it out of hibernate mode for this last night.  I wanted to do a new AutoAlign to see just how good my Polar Align remained at the end of the week. So that's why I was performing a new Alignment, and why I afterwards selected Polar Align to check if the amount of error shown was OK for the short exposure times I was using for Video Astronomy - mostly 10-30 seconds.  I was pleased to find it was good and I didn't need to perform another Polar Align. Yay!  And I pressed Enter ... instead of Back. Pressing Enter started performing another Polar Align!  I didn't need or want to do that at this point, so I pressed one of the arrow buttons and the back button trying to stop it.  I managed to stop it all right ... and lost the alignment.  Arg.
Like I said, I was kinda tired and not paying attention as I should.   

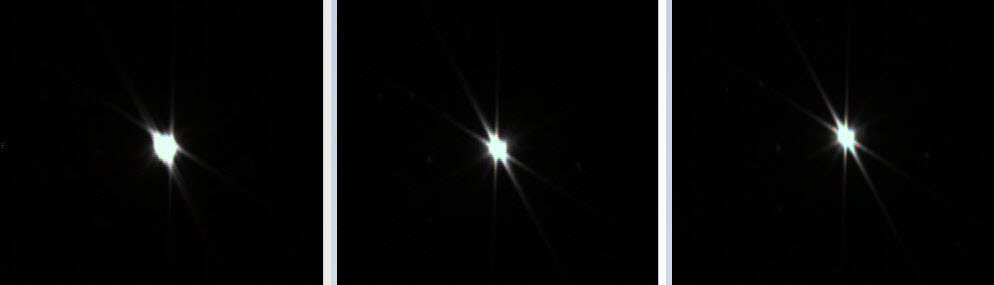
5. There had been clouds at Sunset, then it cleared and we had about a 2 hour window of good viewing.  I thought about giving up at this point, but this was my last night.  So, yes, I started another AutoAlign. I got another good alignment and was ready to start viewing. I checked out a couple of targets and after some slight image adjustments was pleased with the images I was getting.  I tried some additional adjustments and the image became unexpectedly poorer.  I had been using the DSc on my 5" Celestron earlier in the week and was pleased with the results. But the images I began to see now looked washed out.  I tried some more adjustments that seemed to help, then it got worse again. I did this for a while before I realized what the problem was.  I looked up ... and clouds had begun to move back in again!  The good viewing nights this week had been clear all evening - no clouds to worry about. But I knew about the prediction of clouds coming back in and should have been watching for changing conditions.  I am usually good at persevering and working past problems I run into.  But the better part of wisdom is knowing when to quit as well. The clouds were only going to get worse.


I really had a great week of viewing at ECVAR, and decided to not let this evening's adventures spoil it for me. Live and Learn. So I quit for the evening, and as I got ready for bed I thought about all the amazing things I was able to see earlier this week under sky conditions I never see back home!


0 Comments

Remote Focus Mask and Remote Dark Mask

9/13/2015

1 Comment

 
In my 9/9/15 post below I described a prototype attachment for the dew shield of my telescope that allows me to remotely flip a Focus Mask in place from my laptop to allow me to easily adjust the focus from inside.   As I mentioned, this was made for me by a long-time friend of mine, Richard Root.  He and I have also discussed how the same concept could be used to remotely flip a Dark Mask over the end of the telescope using my laptop inside to be able to easily take dark frames anytime I need to during the evening due to changes in temperature, exposure lengths, etc.  The Focus Mask motor is connected to control electronics that can be located anywhere on the mount.  A USB cable runs from the control electronics to a powered hub at the telescope where all my other remote devices are attached.
Picture
Here is a short video clip showing the Remote Focus Mask in operation.
Last night I actually had a fairly clear evening that enabled me to try both of these out before I head out for the ECVAR star party tomorrow morning.  I was using a SkyProdigy mount with AutoAlign for quick setup and my Celestron 5" F10 telescope on it. I used the new MallinCam SkyRaider DSc camera that has a single USB cable for power, control and video that makes it great for Remote Video Astronomy!  I had a MallinCam focal reducer MFR-5 attached to the camera.  The MallinCam DSc camera and MALLINCAMSKY software are designed to make real time use of dark frames to remove background noise and hot pixels, and so it was a good test camera for a Remote Dark Mask as well.

A Focus Mask, known more formally as a Bahtinov mask after its inventor in 2005, creates three angled diffraction spikes when the telescope is aimed at a bright star.   Two of the spikes form an X while the third spike moves from side to side as you adjust the focus.

I turned on the SkyProdigy and let it do its AutoAlign and then slewed to Vega. Next I entered our Focus Mask close command on the laptop to move the Focus Mask in place. 
I then adjusted the JMI MotoFocus that I have on my C5 scope to remotely change the focus using their PCFC application on my laptop.  The image on the left is how it looked as I got close to focus.  The middle image shows how I went a little bit past focus.  It is so easy to know you have arrived at good focus when the third spike is right in the middle of the X as shown on the image on the right. 
Picture
I then entered our Focus Mask open command on the laptop to move the Focus Mask out of the way. 

Now I was ready to try out the Remote Dark Mask concept.  For this I had cut out a simple felt pocket square that slips over the Focus Mask.  Richard and I have discussed having a separate Dark Mask on the same ring that can be flipped into place when needed.  But the felt pocket over the Focus Mask worked for my prototype test.  Here is a clip of how it worked last night.

I slewed my telescope to M27 and set the DSc camera for a 5 second exposure, which produced a nice near real time image of the Dumbbell nebula.  I then entered the command to close the Dark Mask over the end of the telescope, and used the MALLINCAMSKY software to capture ten 5 second Dark Field exposures by setting the Dark Field Correction quality to 10, clicked on Capture and waited for it to complete.  Next I typed the command to open the Dark Mask away from the end of the telescope, and I enabled Dark Field Correction in the MALLINCAMSKY software.  The original image I saw is shown below followed by the image with Dark Field Correction enabled that removes the hot pixels from the image.
Picture
Picture
Richard's next step is to shrink the control HW into a single board that controls both a Focus Mask and a separate Dark Mask.  Richard has a degree in Computer Science while I have a degree in Electrical Engineering.  What is interesting, though, is Richard has a real knack for hardware, mechanics and manufacturing while I am best at software design and embedded software (firmware) programming.  We have worked together as a team for many years covering concept, design, implementation and manufacturing of products.

All in all I was pleased with the concept and ease of use of both the MallinCam DSc camera, the MALLINCAMSKY application, and our Remote Focus Mask/Dark Mask prototype.  I'll definitely be trying this out more at ECVAR this week!

1 Comment

My Equipment for ECVAR star party

9/9/2015

0 Comments

 
After seeing the two video clips of my main RVA setup and my small portable RVA setup (see my 9/7/15 post), someone asked me which setup am I taking to ECVAR.

My Answer: Just for fun I'm bringing both :-)

The weather has been really poor this year in my area, so I hope to get some "quality" time on both setups at the star party.

I plan to also bring my MCR-80 ED which mounts nicely on my small portable RVA setup.  I'm bringing my SkyRaider DSc too which will work well with both my main and small portable setups.  I'm still learning how to use the DSc and hope to get some good tips while there.

One other thing I'm bringing is a prototype focus mask flipper (how is that for a name) that a long time friend of mine made for me and brought over to my house tonight.  It allows me to remotely flip a focus mask in position over the end of my 5" dew shield for adjusting the focus as needed, and then flip it back out of the way, all from my laptop. (I have a JMI Motofocus installed on my Celestron 5" telescope so I can focus it remotely). He and I have also discussed how to add moving a dark cover in place to be able to easily take dark frames whenever you want.
I figure you can never have too much equipment with you.  That's better than wishing you had brought something you left at home.

0 Comments

"Portable" Remote Video Astronomy setups

9/7/2015

0 Comments

 
Normally I keep my main Remote Video Astronomy setup covered in my garage and just roll it out onto my driveway, perform an alignment, and I'm ready to go in just a few minutes time. 
Picture
I run a single USB cable from the telescope to inside to control the equipment from my laptop and can see the view through my telescope on my computer screen inside in near real time.

In about a week, my wife and I will be heading to Virginia with our camper to attend the ECVAR star party at Cool Breeze campground, just off the Blue Ridge Parkway.  I was wondering just how "portable" my main RVA setup might be.  So this week I disassembled my RVA setup and figured out how to best package everything up for ease of transport and reassembly at the camp site.  
Picture
I then began thinking about how long it might take me to set everything back up again once I get there.  So I decided to find out...and recorded a time lapse video of the process.  I had never used the time lapse video option on my iPhone but thought it was worth a try, and it worked great!  I determined I could put my telescope wheel platform in the bed of the truck, so I used it as the base of my assembly.  I could do without it, but it will give me the flexibility of easily moving my setup as needed at the campground.
Picture
So how long did it take?  45 minutes.  

Once I had it set up, I rolled it from my patio to a viewing position in my backyard to verify everything worked as expected.   I initially checked everything out next to the telescope with a single USB cable providing the link to control the scope and cameras.  My laptop is a Microsoft Surface Pro2 with a single USB port, running Windows 8 using a Bluetooth mouse.
Picture
I then added an active USB extension cable between the telescope connection and the laptop to make sure I could control and view everything remotely from under a canopy, or even from inside our camper. I can power the setup from an AC extension cable or from two battery Power Tanks.  

You can watch the time lapse video of my assembly process on You Tube for your entertainment by clicking the image below.


I also have a grab-and-go Remote Video Astronomy setup that I keep out in our sunroom.  It is has a SkyProdigy mount (with StarSense built in) and is usually configured with a Celestron 5" telescope, JMI remote focus control and a MallinCam Micro-Super camera.  It also uses a powered hub at the telescope and a single USB cable from the telescope to my laptop.
Picture
It obviously packed up in fewer carrying bags.
Picture
I again recorded a time-lapse video of setting it up.  This was same song, much shorter second verse!

So how long did it take to set up? 7 minutes.

Once I had it set up, I carried it from my patio to a viewing position in my backyard to verify everything worked as expected.   I checked everything out next to the telescope with a single USB cable providing the link to control the scope and cameras.  I normally power this setup with battery packs instead of AC. 
Picture
You can watch the time lapse video of the assembly process of my grab-and-go RVA setup by clicking the image below.

0 Comments

This little light of mine ...

9/6/2015

1 Comment

 
Disclaimer: For those of you who do not have an equatorial mount and a polar finder scope, you can ignore this short post. 

This past week I was looking through plastic bins of times past for some items I needed, and ran across a little led light that I had wrapped in red cellophane for night use. 
Picture
As I looked at it, it hit me that it would be perfect for illuminating my polar finder scope on my CG-5 equatorial mount.  I had tried to make something before for this but it didn't work out, so I normally just hold a red led flashlight near the upper end of the telescope axis while I perform a manual polar align. This is sometimes awkward though.  Eyeing my old modified led light, it looked like it could clip on the mount right above the upper axis and I could bend it to provide just the right amount of red illumination to my polar finder scope without it being in the line of sight.

So I tried it and it worked!  Here is a picture of it clipped into place and another picture without a flash to give an idea of the low red light it provides in just the right place.


Picture
Picture
When I am finished with the manual polar align, I simply un-clip the led light from the mount and clip it to the tripod tray so it is handy the next time I need it.
1 Comment

Inside Out

8/5/2015

0 Comments

 
Your portable telescope has to be outside, but what do you do if you would like to be inside where it is opposite of outside?  Inside is warm in the winter and cool in the summer (and no bugs).  This is one of the many reasons I like Remote Video Astronomy, and particularly so when using our camper to get away from city lights.  In my 1/20/2015 post I describe using one of my portable RVA setups and show a picture of how I ran the single USB cable from the telescope in through the storage compartment of our small pull behind camper so I could operate my equipment from inside the camper.

Recently we decided to get a bigger camper.  It all started with getting a bigger truck, and then deciding to go with a fifth wheel travel trailer (the type that attach to a hitch in the center of the bed of the truck for more stability, better maneuvering, etc.).  This camper was much better sealed and there was no easy way to run the USB cable inside.  So I took a page from my book “Beginning Remote Video Astronomy … So, what’s the matter”, question 42, to make a pass through port in the back of the new camper like I have done at my house. 

I purchased two waterproof outlet covers with gaskets and a short piece of 1” diameter PVC pipe.  I decided to use 1” pipe in case I ever want to run multiple cables inside.  After checking with my local dealer where I have my camper serviced to find a “safe” place on the back of my camper, I had them drill a 1” hole though the back wall.  They then cut a short length of the 1” PVC pipe that matched the wall thickness and inserted it in the hole.  They also mounted the outlet covers over the hole on the outside and inside of the camper for me.

Picture
Picture
There is plenty of room to run one or more cables inside. I use a short piece of foam that came out of one of my eyepiece cases to insert inside the pipe when it’s not in use.
Picture
When I set up out in the wild, I just open up the outside outlet, pull out the foam and insert the USB cable into the pipe letting the spring loaded cover down to hold it in place.  I then go inside, open up the outlet and pull the USB cable on into the camper and attach it to my laptop.  I am then all set for my RVA operation in the comfort of the camper.
Picture
0 Comments

LightSail first mission

6/21/2015

0 Comments

 
LightSail launched to low Earth orbit May 20 aboard the same rocket that lofted the U.S. Air Force's robotic X-37B space plane on its fourth mystery mission. The cubesat was tasked with proving the viability of some key components of solar-sailing technology, which allows spacecraft to harness the momentum imparted by photons streaming from the sun. On this first flight, mission managers wanted to see how LightSail's core systems work — especially the gear designed to deploy its 344-square-foot solar sail. The overall goal was to pave the way for a true orbital solar-sailing trial by another LightSail cubesat, which is due to launch next year. (Fox News)
Picture
There are 4 days left to be a backer.  I am a backer and here is the link if you are interested.

https://www.kickstarter.com/projects/theplanetarysociety/lightsail-a-revolutionary-solar-sailing-spacecraft

Picture
0 Comments

StarSense AutoAlign / Video Finder Scope mounting

6/3/2015

1 Comment


What do you do with the finder scope of a Celestron 8SE if you have to remove it to install a StarSense AutoAlign?  Do you have to drill new holes if you want to use a Mallincam Micro for a video finder scope?  These were a couple of questions asked by one of the readers of my book "Beginning Video Astronomy...So, what's the matter?".
Let me first say don't drill! You can make use of existing screw holes by first removing the telescope's small plastic Star Pointer with a Phillips head screwdriver.
Picture
 I then installed an Orion 07215 Schmidt-Cassegrain Finder Scope Base which fits the factory drilled holes where the Star Pointer was located (it is also compatible with Meade and Orion Schmidt-Cassegrain telescopes). It attaches directly to the SCT optical tube with included mounting screws that are slightly longer than the screws you remove from the SCT optical tube.  The extra length is needed to be able to attach the Orion base to the telescope.  It actually comes with two pairs of screws.  You have to examine them closely to group the pairs.  You will only use the pair that matches the threads of your factory drilled holes.  Carefully try one of the screws in one of the screw holes, turning it by hand to make sure it goes in without stopping. If so, that is the pair to use.  If not, try the other pair.  Here is the Orion base mounted to the SCT optical tube.
Picture
The StarSense AutoAlign comes with two types of brackets. You can use the larger bracket on the Celestron 8SE telescope, but if you use the smaller bracket you will be able to easily switch between the StarSense and the Video Finder Scope. Follow the StarSense instructions to replace the large bracket with its small bracket. The small bracket is compatible with the Orion finder scope base so you can just slip the StarSense into this base and tighten the hand screw.
Picture
I am currently using the Mallincam Micro-Super with the Orion 13022 Deluxe Mini 50mm Guide Scope for my Video Finder scope.
Picture
The video finder scope will also easily slide into the Orion bracket base.
Picture
The MallinCam Micro-Super has more sensitivity than the original Micro-EX, but both will work fine as a video finder. If you are purchasing a Micro, I recommend spending the little extra to get the Micro-Super for the extra sensitivity, and it has virtually zero amp glow! I also recommend getting the wired Micro version which has a single lightweight cable that comes out of the back of the camera.  The other end of the cable has video out, power in, a serial camera control socket and a small button control that you use instead of pressing buttons on the back of the video camera.  This reduces the possibility of affecting the alignment of your video finder scope due to heavy cables or trying to press buttons on the back of the camera. Of course I also recommend connecting the serial camera control to your computer and using my free MallinCam Micro Extended Control software to control the Micro from your computer so you can easily select presets for various targets (see my Download tab).

I also installed an Orion finder scope base on my Celestron C5 telescope so I can use the StarSense AutoAlign or Video Finder Scope on it as well.  If you have trouble mounting a finder base on your telescope (e.g. the screws are not long enough), you can take a screw you remove from the telescope to a local hardware store to get a longer screw.  Be sure you match it properly, especially if the telescope screw is metric.  Also take care when screwing the base onto your telescope to insert the screws at right angles to the telescope.  Since the telescope is round, the two screws will not be completely parallel to one another.

So what do you do if you miss having your simple red dot Star Pointer?  I highly recommend getting a TELRAD reflex sight, which is much easier to use.  The red TELRAD rings are continuously adjustable from off to full on.  It is lightweight and requires no mounting screws. You use the supplied double stick tape to mount its base directly to the side of your telescope tube.

Picture
You can easily take the TELRAD on and off. It does look somewhat large, but it is very lightweight.  If you buy the dew cover accessory that also contains a small mirror, in addition to looking straight through the TELRAD you can also view from a 90 degree angle as needed.

What if you want to use both the StarSense AutoAlign for aligning and the Video Finder Scope to assist finding and centering your faint fuzzy objects?  After you complete your StarSense AutoAlign, you can remove it and slide the Video Finder Scope in its place.  Or if you prefer to have both of them mounted on a Celestron C8, you can use the other mounting screw locations and either add an additional Orion finder scope base or install the StarSense AutoAlign large base (and keep the large bracket on the StarSense AutoAlign) since there is no need to swap it with anything.  Be sure to use the holes for mounting finders – do not remove the smaller telescope assembly screws!

Picture
Here is a picture of the TELRAD finder, the Video Finder Scope and the StarSense AutoAlign all mounted on my Celestron 8” telescope which is now on a CG-5 Equatorial mount.
Picture
This works fine with the C8 on my Equatorial mount, but on the SE mount this puts the StarSense AutoAlign somewhat on the underside of the Telescope since the C8 is side mounted on the SE mount.  It should still work OK as long as the StarSense AutoAlign “sees” the sky OK.  Be sure to calibrate the StarSense Camera wherever you mount it by selecting the StarSense Camera from the hand controller menu, choosing Calibrate, and then follow the prompts.

Here is another picture that better shows the various mounting techniques.

Picture
1 Comment

Pebble Polar Align Watchface

4/22/2015

0 Comments

 
Picture
Do you have a telescope with an Equatorial mount?  If so, you know the importance of starting with a good basic polar alignment. I have published a Polar Align Watchface for the Pebble Watch to assist in performing a Polar Alignment on an Equatorial Mount with a Polar Finder Scope installed. 


When I got my new Celestron 8se in January over 3 years ago, I had night after night of wonderful clear skies.  I immersed myself in getting back into Astronomy and quickly got a German Equatorial Mount and then moved into Video Astronomy.  This year it has been cloudy with possible rain today with predictions of cloudy with possible rain week after week.   If the skies then had been like they have been this year in my area, I might have given up.  Glad it was good back then, and I'm trying to be patient now.  Video Astronomy lets you see more than you could ever see looking through an eyepiece.  But even Video Astronomy has trouble seeing through clouds!

So I decided to make myself useful and do some programming to help with my setup process when the skies actually are clear again!  I keep my telescope on my mount covered in my garage and roll it out for viewing.  I ran into an issue though trying to use the Polar Finder Scope with all my equipment already in place.  I found I could rotate the telescope OK to be able to see through the Polar Finder Scope installed in the RA axis of the telescope.

Picture
Picture


Normally you also need to rotate the mount around its RA axis to align the image etched inside the Finder Scope to match what you see in the sky in order to know where to position Polaris on the Finder Scope’s circle. 


With the telescope and equipment already on the mount, some rotation positions around its polar axis are not very practical. So if you cannot do this, what do you do?  I use my Pebble Polar Align Watchface!

When launched, the Polar Align Watchface shows the position of Polaris relative to the North Celestial Pole as seen through a Polar Finder Scope. This watchface enables you to manually adjust the Altitude and Azimuth of the telescope mount to "move" Polaris as seen through the Polar Finder Scope to the watchface's indicated point on the circle of the Finder Scope (without having to rotate the telescope around the mount’s polar axis to match the sky position).

This type of polar alignment will typically be good enough for visual astronomy and basic video astronomy.  I discuss several more advanced polar alignment techniques in my second book “Beginning Astronomy with a Celestron Equatorial Mount … So, what’s the matter?”

Picture


The Polar Align Watch also displays the current local time in 24 hour format and the Month/Day to assist entering time and date information into the telescope hand controller if needed.


To install the Polar Align Watch on a pebble watch, tap the Pebble app on your phone and select Get Watchfaces.  Tap Search and select Watchfaces, and then enter “Polar Align”.  Tap the screen for the Polar Align Watch and Add it to your Pebble watch.  That’s it!

Oh, if you have a lot of cloudy skies, don’t give up.  It will be clear again someday, and it will be worth the wait!

0 Comments

Using a Motorized Focuser

3/3/2015

0 Comments

 
Do you sometimes get frustrated trying to fine tune your focus because the video image jiggles every time you touch the focuser?  I found adding an electric focus motor that attaches to the shaft of a focuser knob and connects to a hand held control provides me with vibration-free focusing without the need to actually touch the telescope at all.

Picture
I purchased my first JMI Motofocus in January 2012 for my Celestron C8 telescope for $180.  It can focus at 3 different speeds and has electronic braking.  When stopped, it holds the focus knob secure so you can’t accidently bump it out of focus.  Combining this with a Bahtinov Focus Mask enables you to easily nail the focus!

 I also purchased the JMI PC Focus Control (PCFC) so I could control the focus from my laptop. I have been using Motofocus and PCFC for 3 years and love being able to easily focus at the scope with the hand control or inside for Remote Video Astronomy using the PCFC (I plug the PCFC USB cable into a powered USB hub at the scope when I am remote inside).  The PCFC price is also $180, but you can purchase a similar PC control called PCUSB for $80 from Shoestring Astronomy that also works with the JMI Motofocus.   

JMI makes electric focus devices for many types and brands of telescopes in addition to Celestron, and this focusing technique works with any Video Astronomy camera.

Last year I bought a Celestron C5 for a portable scope setup, and recently also got a Motofocus for it too.  I can use the PCFC to control the focus of either scope now. You will need to make sure you get the right Motofocus that works with your particular telescope.  I purchased the one for the NexStar 6SE, which is compatible with the Celestron 5 SE, 6 SE and 8 SE.


So how hard is it to install?  Mine took less than 10 minutes.  I removed two of the three screws that hold the focus knob, slid the Motofocus over the focus knob and put the two screws back in place.


Picture
You connect the hand controller to the focus motor using the supplied coiled cable for jiggle free focusing.  The hand controller has two buttons for focusing in or out. A slide switch selects either the slowest speed or a slightly faster speed.  Holding either button down for over a couple seconds will begin to run the motor much faster for coarse focusing. 

Picture
I attached Velcro to the back of my hand controller to be able to stick it to the mount when not holding it.  Below shows the Motofocus connected to the PCFC controller in place of the hand control.

Picture
Here is the PCFC plugged into my laptop running the free software you download from their website. 

Picture
When you click on the icon for the focus software it reports it found the PCFC. 

Picture
Click OK to bring up the PCFC control panel.
Picture
You can click on buttons for a single Motor Forward Pulse, Motor Forward using Click/Hold or Motor Forward Full (or reverse).  After clicking Motor Forward Full it will run in that direction until you click on Motor Off, which is useful if you have just added a focal reducer and will need to change the focus a good bit.  You can fine tune the PWM Frequency, Motor Speed and Pulse Time for best operation with your setup.  When I plug the PCFC into a powered hub instead of directly to the computer I find it works best to have the Motor Speed set higher to supply ample voltage to the motor.

The Motor Time Accumulator gives you an approximate idea of how far you have moved the focus and you can reset the counter to zero.  This is just based on run time since this model of the Motofocus does not provide feedback of its position to the software.  (JMI makes more expensive models that include digital readouts and feedback of their position to the software).  You can download ASCOM drivers for the PCFC that enable it to be controlled by other software that is ASCOM compliant as well.


This setup has been very good for my needs so far. To me it has been well worth the price for its usefulness over these last few years.


0 Comments
<<Previous
Forward>>

    Author

    Astronomy was my favorite hobby many years ago, but was gradually set aside due to work, family and life in general.  In recent years I resumed my hobby looking forward to using the new technology that is now available.  Then I discovered Video Astronomy.  Then I learned how to do it Remotely.  I wrote some books, and decided to set up this web site to continue to pass on what I learn.

    ​Jim Meadows

    Questions or comments?  Email me at:
    ​RemoteVideoAstronomy@aol.com

    NOTE: If you use Microsoft Edge and clicking on an Archives or Categories link below does not work, please try an alternate browser (e.g. Chrome).

    Archives

    February 2025
    August 2024
    April 2024
    February 2024
    October 2023
    June 2023
    September 2022
    May 2022
    May 2021
    December 2020
    October 2020
    May 2020
    March 2020
    February 2020
    July 2019
    June 2019
    May 2019
    January 2019
    December 2018
    November 2018
    October 2018
    April 2018
    March 2018
    November 2017
    October 2017
    September 2017
    August 2017
    June 2017
    April 2017
    March 2017
    January 2017
    December 2016
    October 2016
    August 2016
    July 2016
    May 2016
    April 2016
    March 2016
    February 2016
    January 2016
    December 2015
    September 2015
    August 2015
    June 2015
    April 2015
    March 2015
    January 2015
    December 2014
    November 2014

    Categories

    All
    Accessories
    AGc / AGm
    Articles By Others
    Astrophotography
    Auto Align
    Build
    Commentary
    DS10c
    DS2.3+
    DS26cTEC
    DS8300cTEC
    Eclipse
    Focal Reduction
    Hyperstar
    LHDR
    LPP
    Mallincam Micro
    MallinCam Netbook Kit
    MallinCamSky
    MallinCam X2 / XT
    MallinCam Xterminator
    Miloslick
    Mmec Software
    Permanent
    Pier
    Portable
    Pro Dob 2
    RASA
    RVA
    SkyBT
    SkyFi
    SkySafari
    SkyShed
    Software
    Solar Viewing
    Star Parties
    Starter Telescope
    Video Astronomy

    RSS Feed

Web Hosting by Domain.com