Remote Video Astronomy
Practical solutions to questions when using video assisted Astronomy remotely
  • Home
  • RVA
  • Start Simple
  • Learn More
  • Expand
  • Downloads
  • Blog

2020 Great Conjunction of Jupiter and Saturn

12/24/2020

0 Comments

 
Near the end of the year 2020, there has been a special astronomical event - the closest great conjunction of Jupiter and Saturn in 397 years. A conjunction is when two objects “appear” close to each other in the sky. A conjunction of Jupiter and Saturn only happens about once every 20 years and is called a great conjunction.

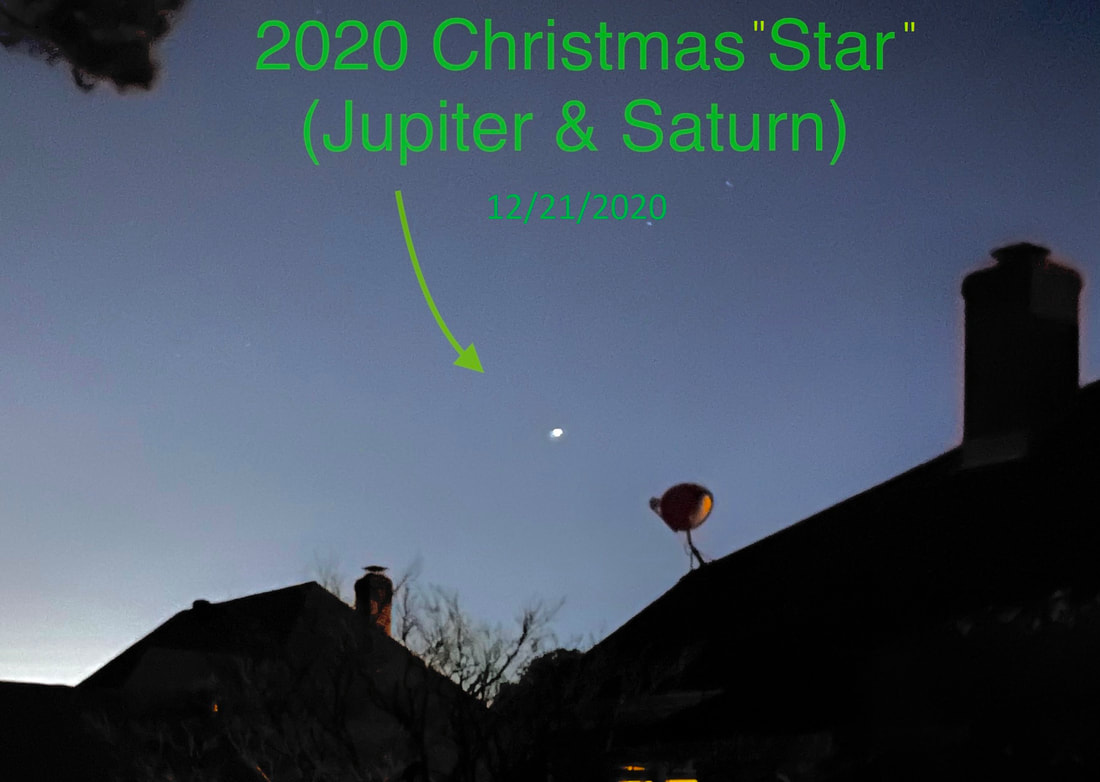
On December 21, 2020,  Jupiter and Saturn were separated by only 0.1 degrees, and appeared at first glance to look like a single bright “star.” If you had good seeing conditions and looked carefully you could tell that it was actually two objects very close together.

Since the occurrence of Jupiter and Saturn being this close together was just a few days before Christmas and looking like a single bright star in the sky,  the 2020 great conjunction is sometimes referred to as the “Christmas star”.

The December 21, 2020 conjunction was the closest great conjunction since July 16, 1623, where Jupiter and Saturn were slightly less than 0.1 degrees apart at the conjunction. However, it would have been difficult, if not impossible, to see it then since they appeared close to the Sun. The last time that these two planets were separated by less than 0.1 degrees and were easily observable was almost 800 years ago, during the great conjunction of 1226.

Jupiter and Saturn are much farther away from the Sun than the other planets we can see with our naked eye. Since an object's orbital speed decreases with distance, it takes them longer to go around the Sun.  Earth completes one orbit around the Sun in 1 year, Jupiter takes 12 years, and Saturn takes 30 years. Due to their long orbits, Jupiter and Saturn are seen together in the sky only once every 20 years.

But appearing as close together as in 2020 is rare. After 2020, the next great conjunctions will occur on November 2, 2040 and April 7, 2060 and their minimum separation will be 1.1 degrees. That’s 11 times farther apart than they appeared on December 21, 2020 this year. This year’s great conjunction was unusually close. Over a period of 1,000 years there are only six great conjunctions where they are less than 0.2 degrees (1623, 1683, 2020, 2080, 2417, and 2477).
​

Here is a graphic that shows the location of Saturn and Jupiter in the sky about 45 minutes after sunset on various days leading up to their conjunction on December 21, 2020.
Picture
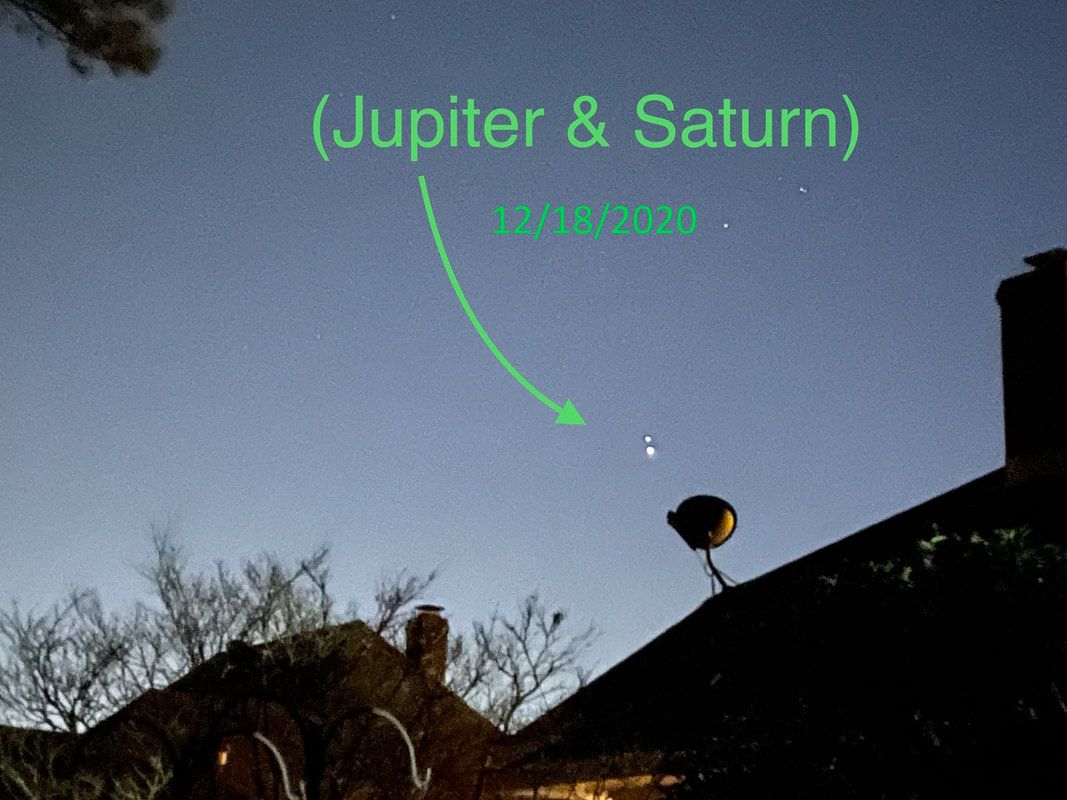
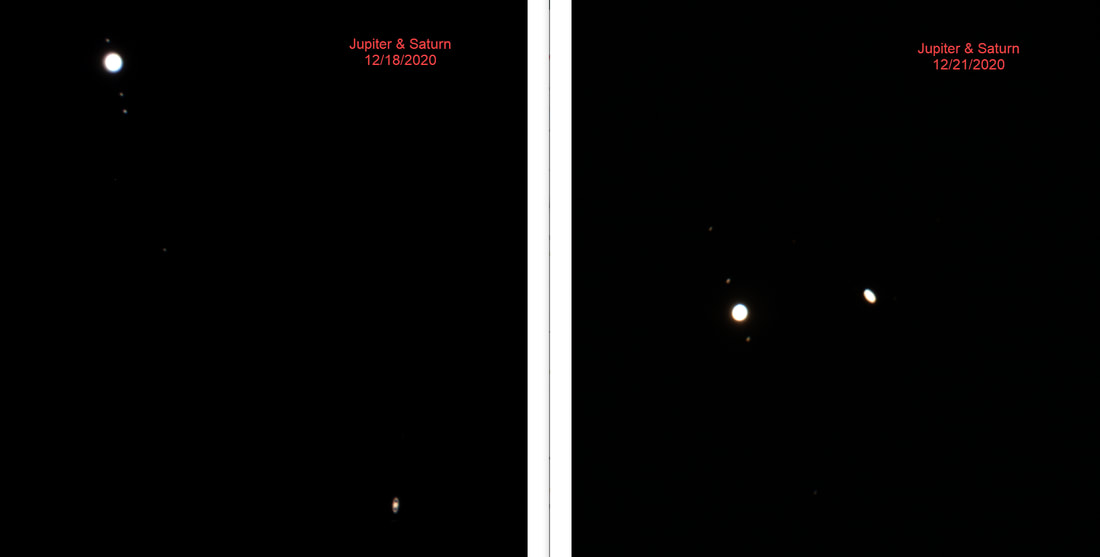
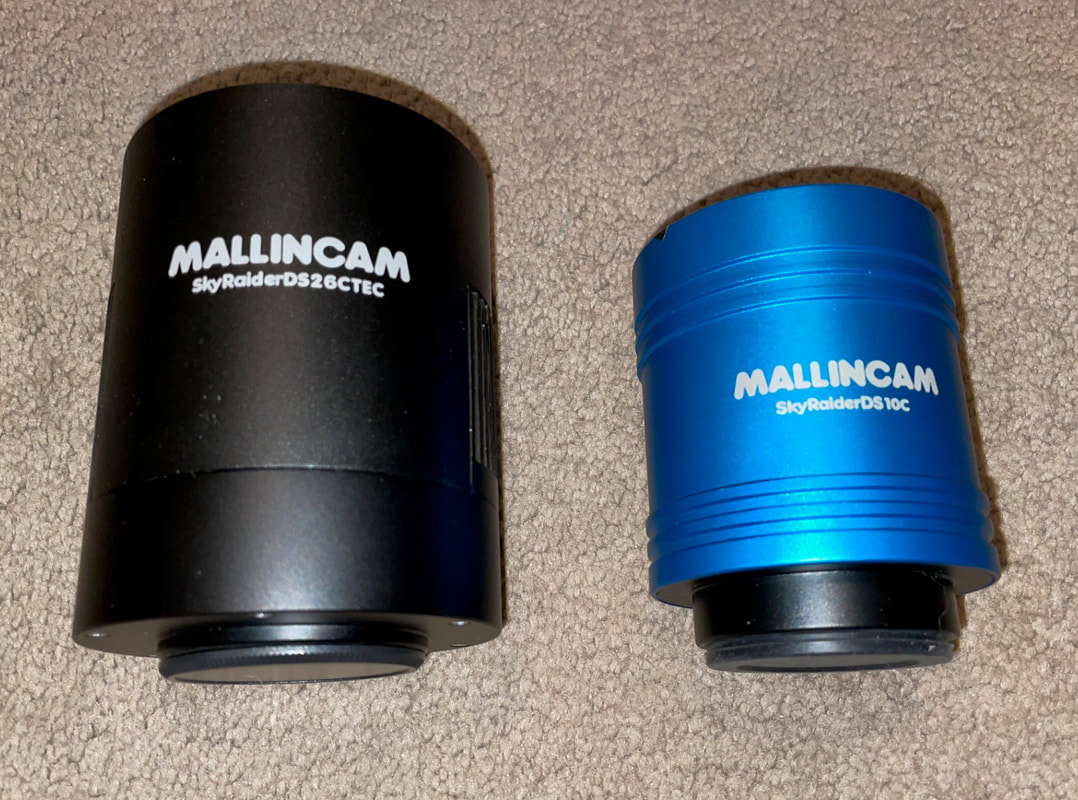
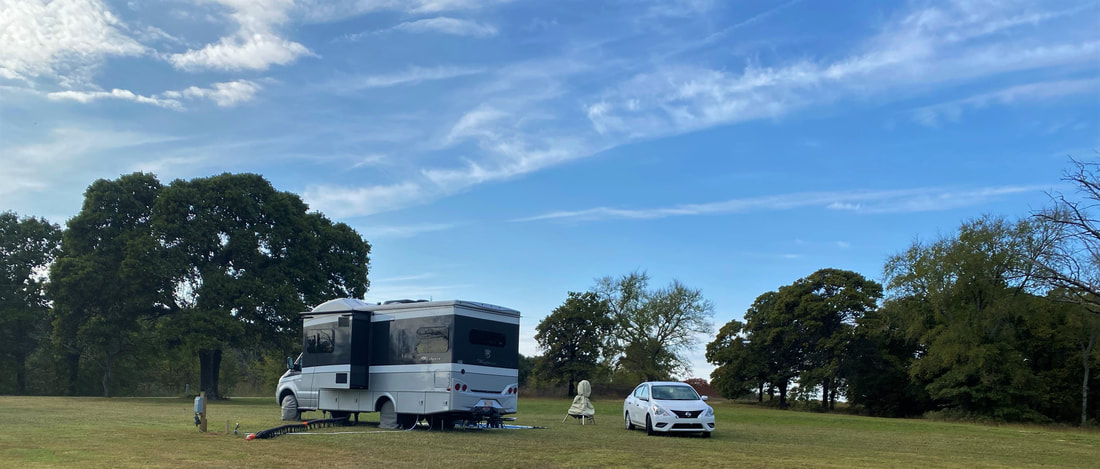
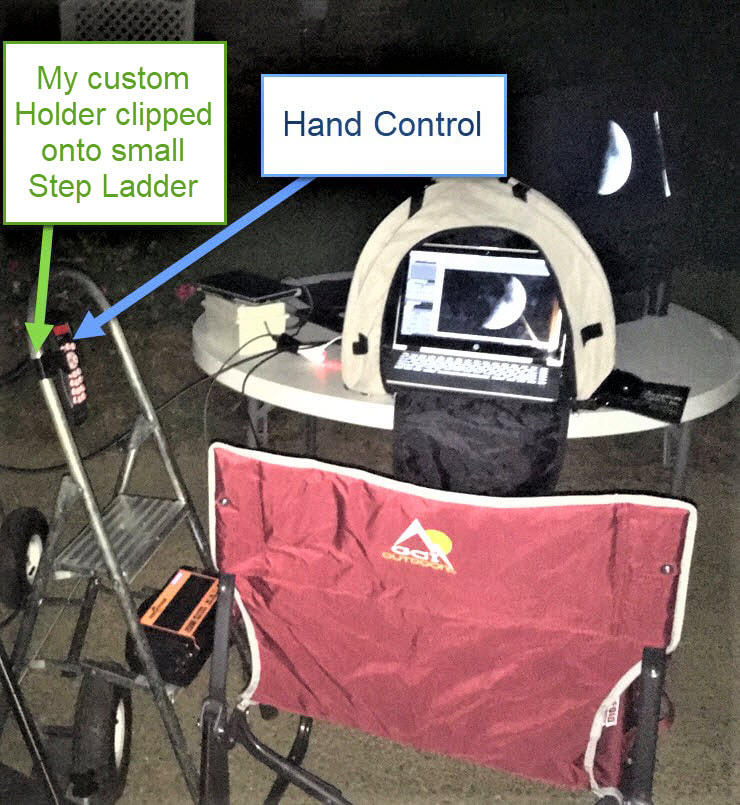
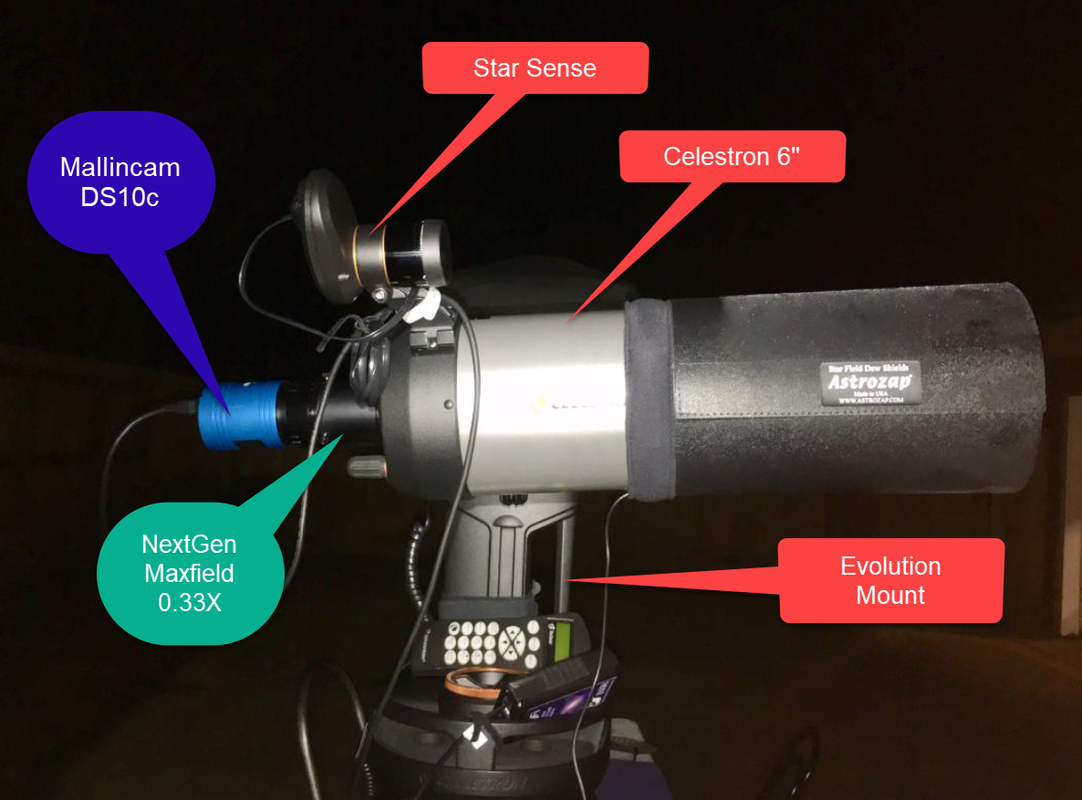
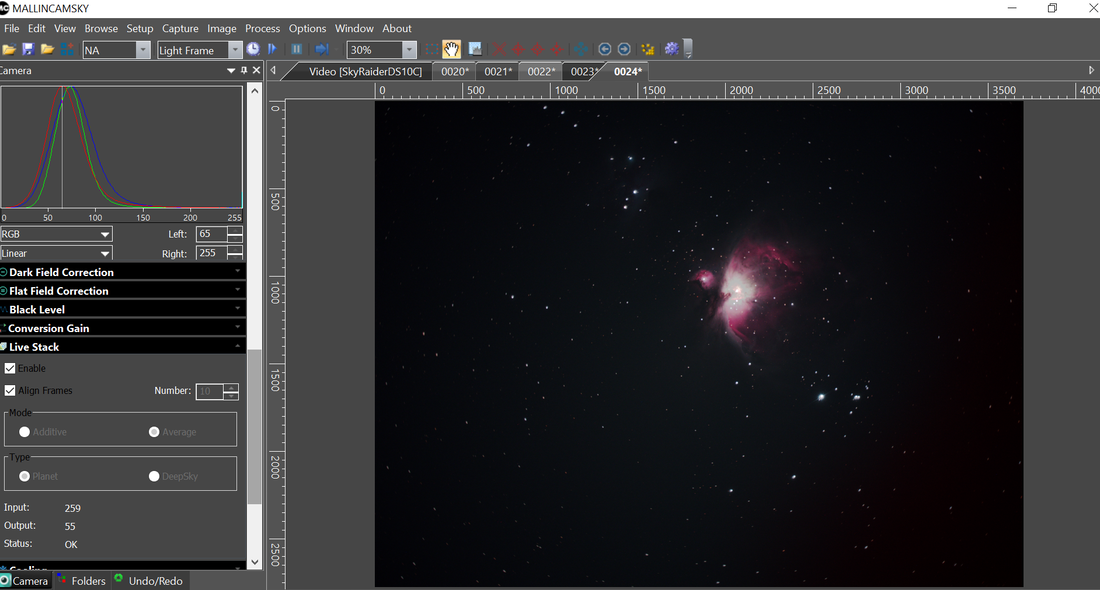
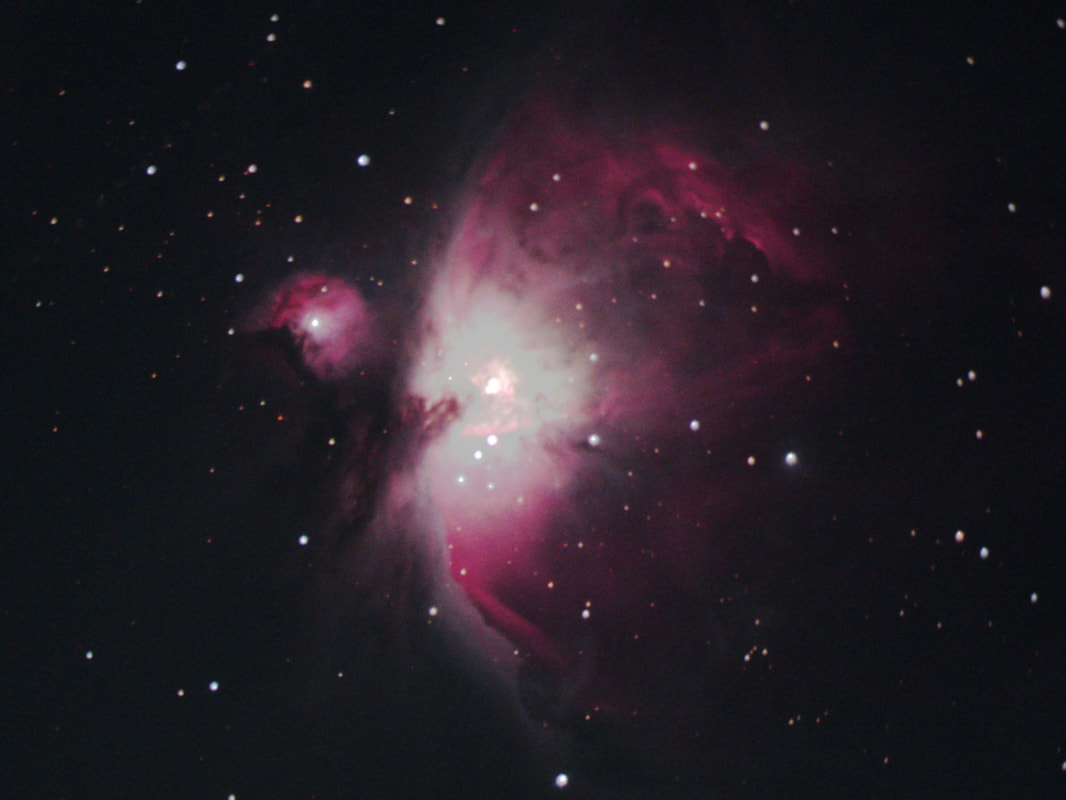
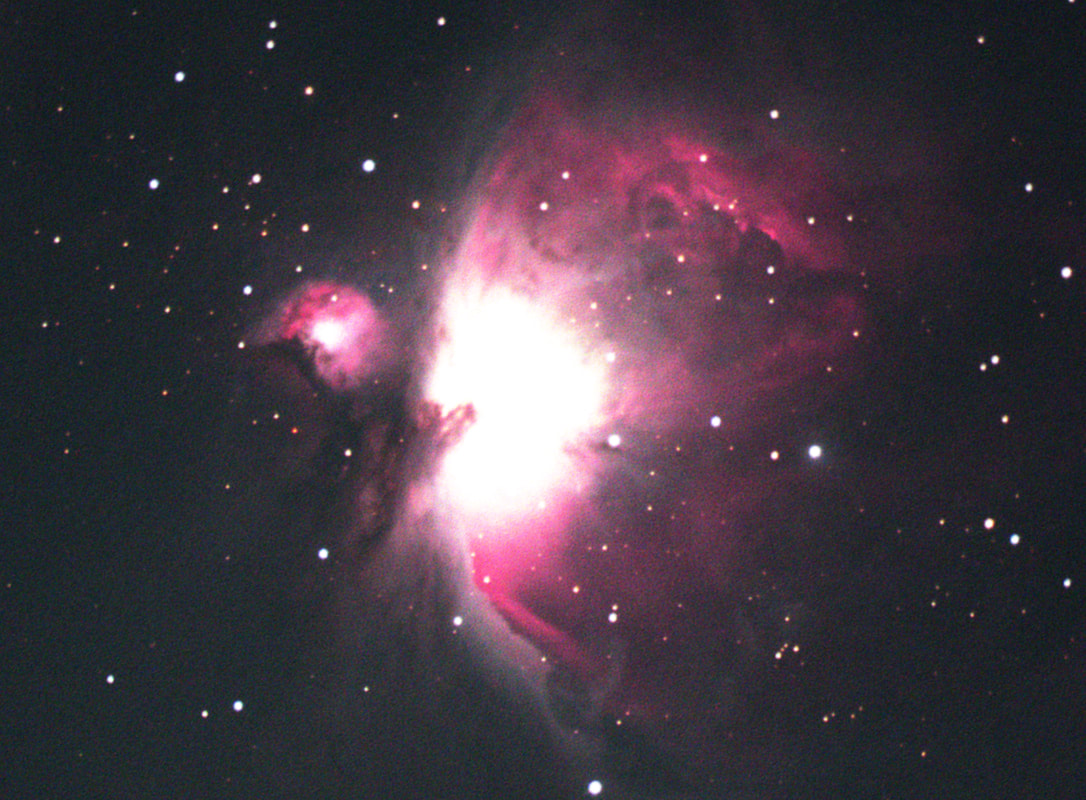
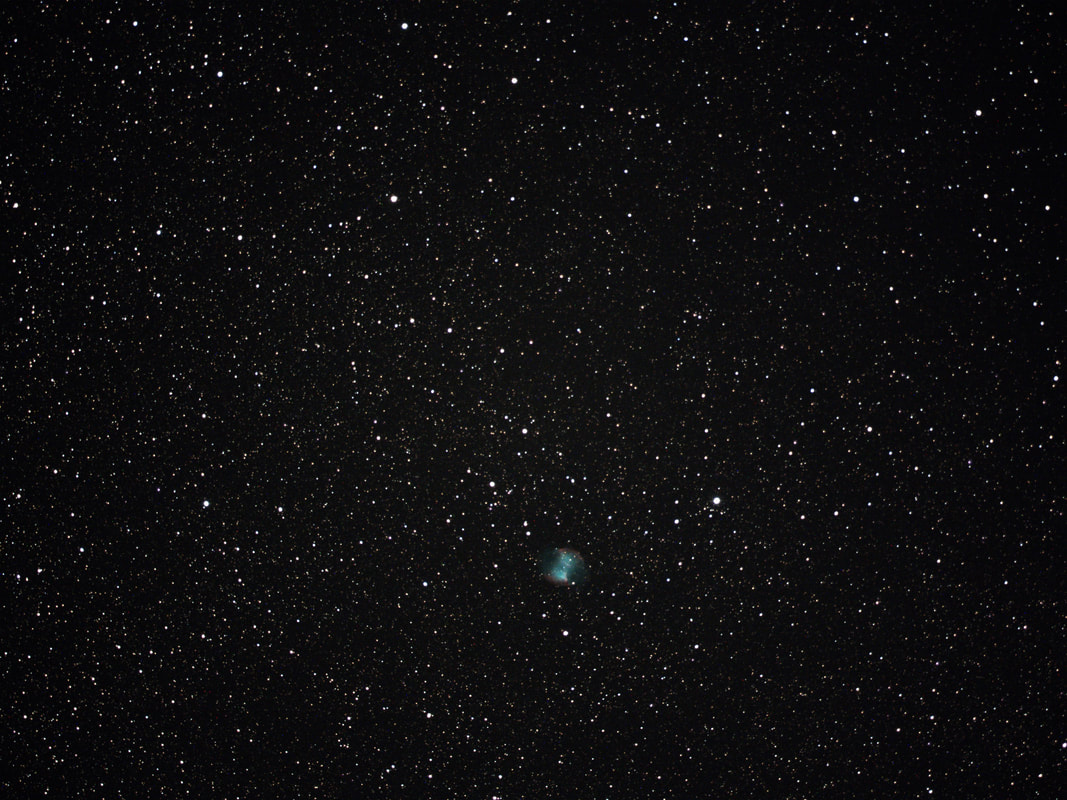
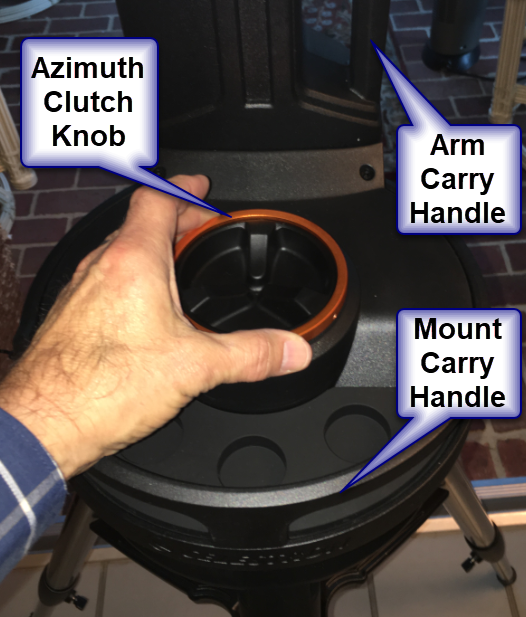
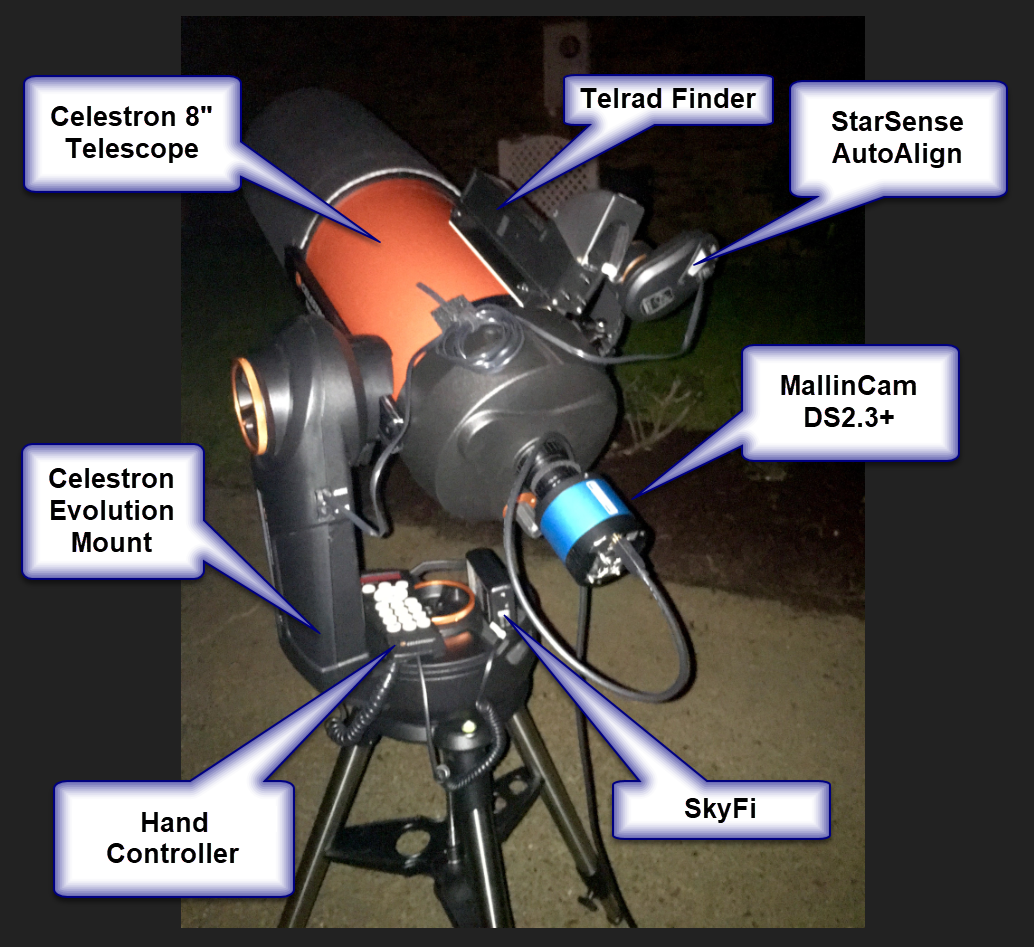
I observed their positions on Friday, December 18 and Monday, December 21. Both evenings I took a picture with my iPhone and captured images with my MallinCam DS26cTEC through my 8” Telescope at F8. Here are the pictures I took from our back yard with an iPhone 12 mini looking Southwest over our rooftop.
Picture
Picture

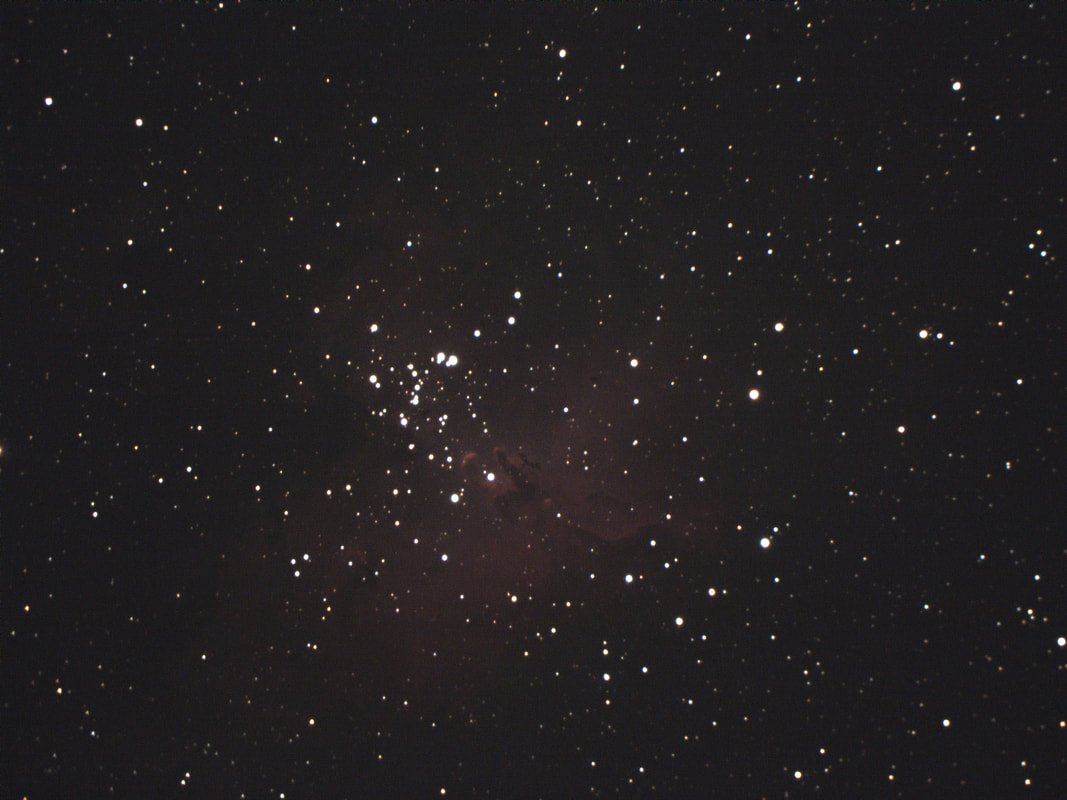
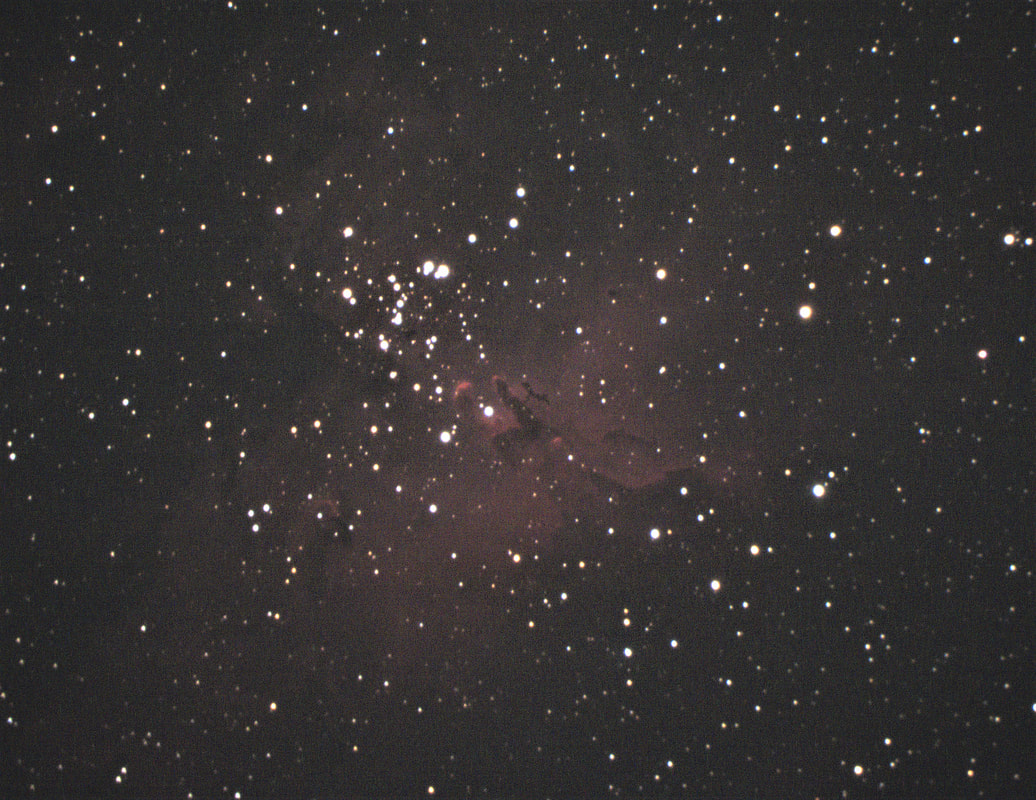
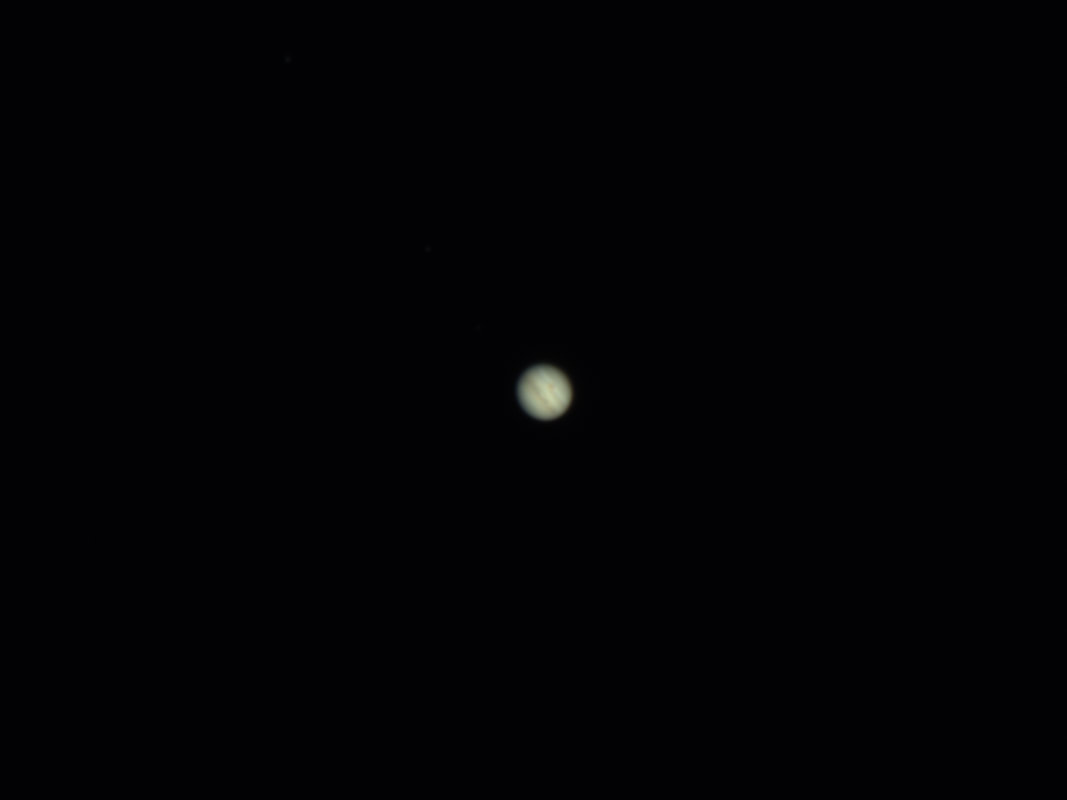
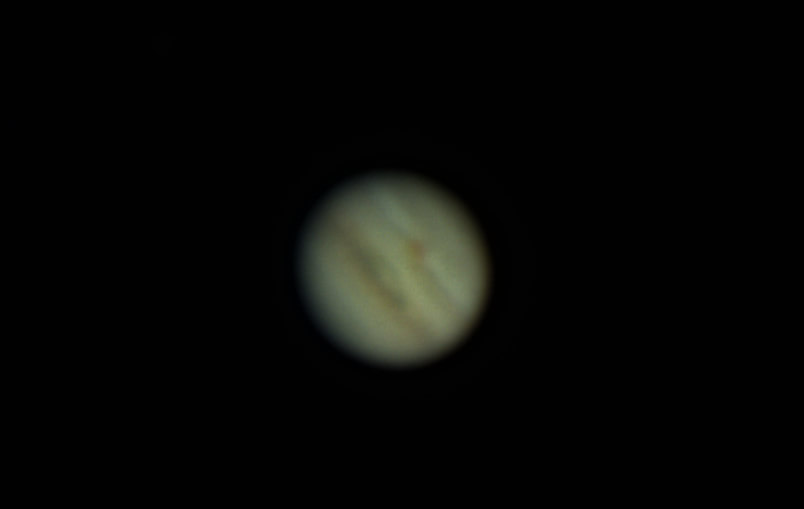
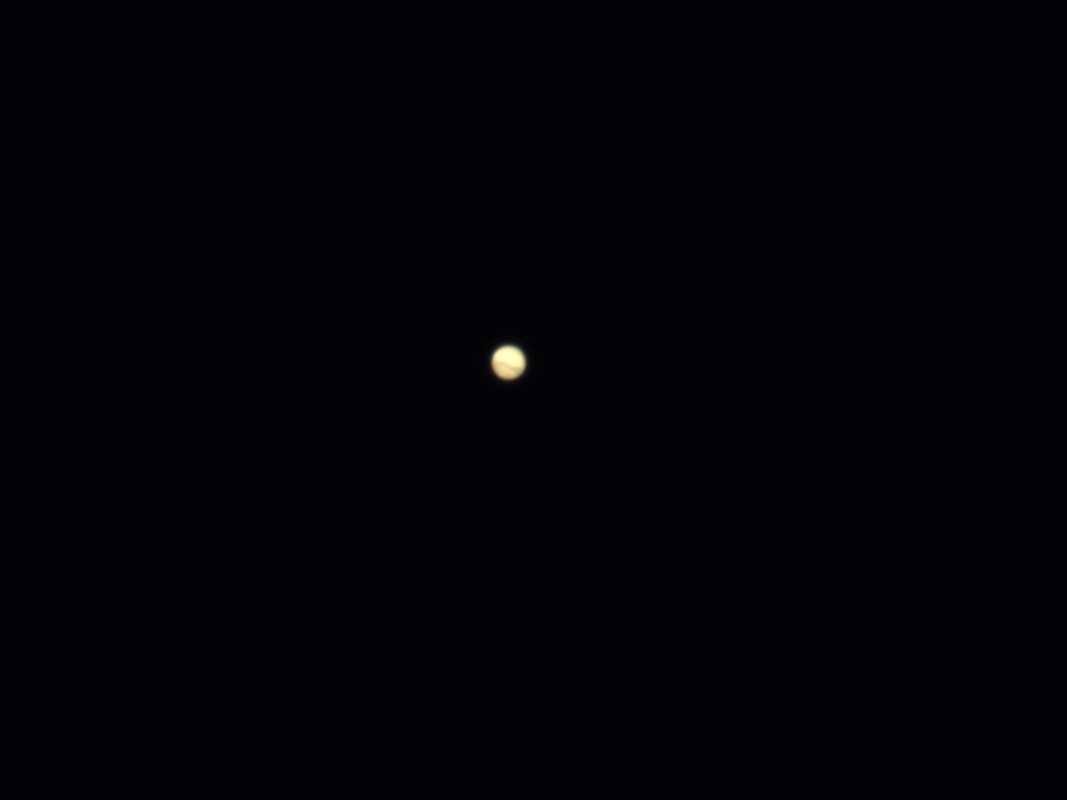
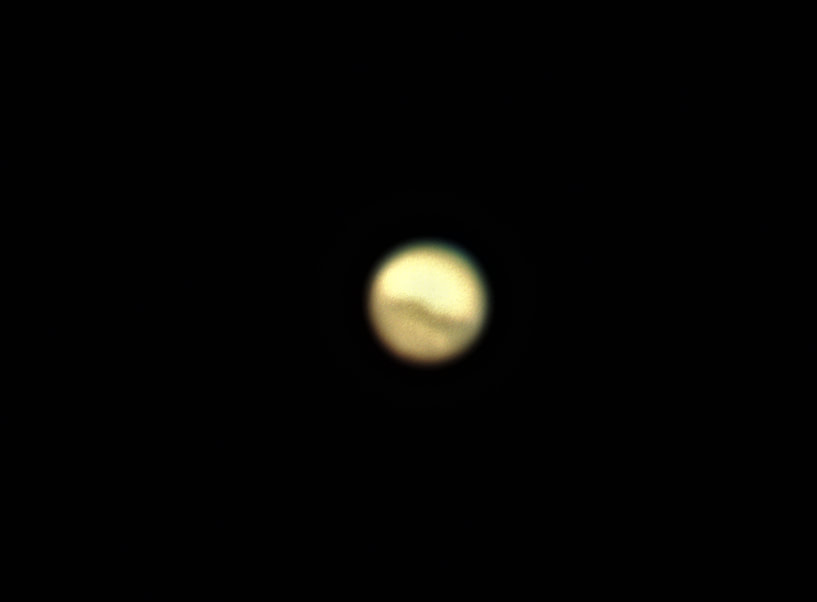
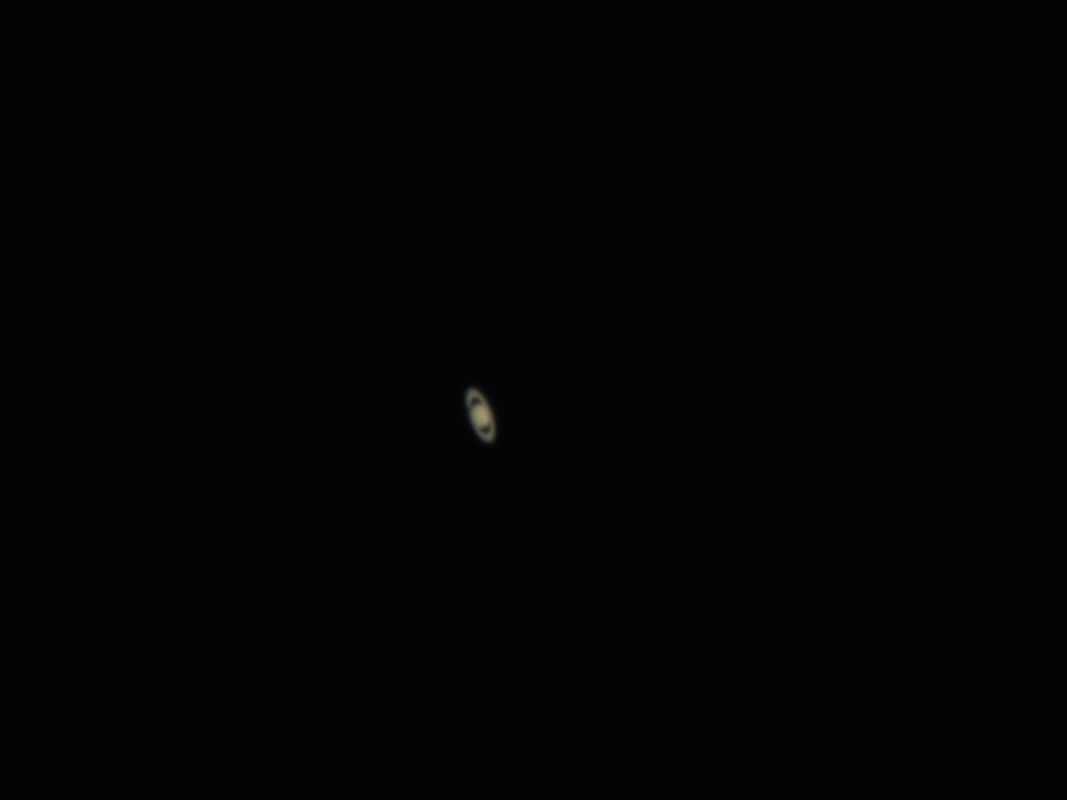
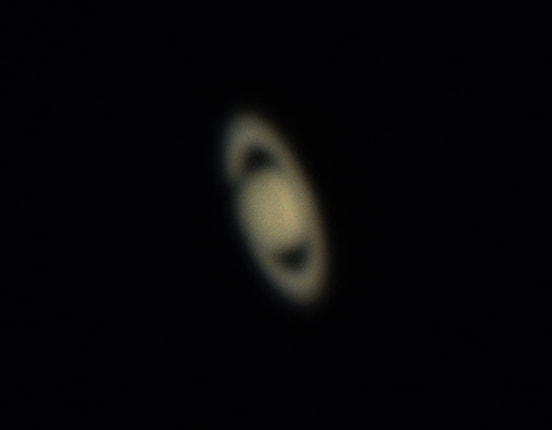
​Here are the images from my telescope on those two evenings.  The image on 12/18/2020 is a composite of two image captures at different exposures to be able to see the rings of Saturn better.  These come from actual images I saw on my laptop screen with no planetary post processing. The one on 12/21/2020 is a single image capture and Saturn does not show up as well, but the shape of the rings are still noticeable. Some of Jupiter’s moons are visible in the images from both of these days.  You can see how Jupiter and Saturn appear very close together on the 21st compared to just 3 days before.
Picture
Here is a link to a nice image capture of Saturn and Jupiter on December 21, 2020,  by Thom Pfeil in Fayetteville, Texas using a Mallincam DS16cTEC on a 9.25” Telescope at F10.
​
Jupiter/Saturn conjuncture 2020 | Taken from Fayetteville, T… | Flickr


​​Note: Portions of the detail information about Jupiter and Saturn conjunctions came from Graham Jones’ article “The December 2020 Great Conjunction” on timeanddate.com. 
0 Comments

DS26cTEC First Impressions

12/15/2020

1 Comment

 
I recently purchased a Mallincam DS26cTEC Video Astronomy camera that has a large 28.3mm Class 1 CMOS sensor with 6224x4178 resolution.   I have been very pleased with my existing DS10c, but had been thinking about getting a TEC camera for active cooling and greatly reduced hot pixels. When I heard about the DS26cTEC, I decided that was the TEC camera for me to move up to with an even bigger FOV, higher resolution and increased sensitivity.

Here are some of my first thoughts about the DS26cTEC…
1. The larger chip produces a very nice Field of View (chip diagonal 28.3 vs 21.63mm for DS10c)
2. Its smaller pixel size produces higher resolution detail (3.76 vs 4.63 microns for DS10c).
3. This is a lot of pixels (26.1 vs 10.7 megapixels for DS10c)!
4. The sensitivity is extremely good. When using 2x2 binning, it is awesome. I have also tried 3x3 and 4x4 binning with decent resolution. When using different binning settings, the FOV remains the same.
5. The TEC cooling produces very pleasing images without having to use darks (it uses the same cooling system as DS10cTEC version). Moving to a camera with TEC cooling does require a second cable to the camera for power, but I was able to easily figure out how to route the power cable at the telescope up to the camera.
6. No amp glow (same as DS10c).
7. I find using the Region of Interest (ROI) setting in MallincamSky is really effective with this camera for “zooming” in on your target and only stacking the pixels you are interested in. This also reduces the file size of saved images.

On the left is a picture my new black DS26cTEC next to my blue DS10c (which does not have TEC cooling), and on the right a picture of a black DS10cTEC (with cooling).  
Picture
Picture
As you can see in the image on the right of a DS10cTEC, the addition of the TEC cooling feature increases the size of a camera, and it is worth it!
​
The MallinCam website describes the TEC feature this way. “MallinCam developed a unique cooling system that provides no direct physical contact between the Peltier cooler and the sensor.  Instead, the Peltier cooler creates a convection system “refrigerator-like” environment that cools the sensor without actually contacting it.  This cooling system is unique to MallinCam and not found on other astronomical imaging cameras.” … “ MallinCam has successfully designed a working alternative - a cooling chamber called refrigeration cooling - which subjects the CMOS sensor to cooling inside a triple sealed vacuumed sensor chamber controlled with a heating element mounted around the internal optical window to control and avoid dew formation on the optical window and surroundings. A vacuumed sealed chamber is used to eliminate the use of desiccant material and keep dew free environment permanently.” … “The result of this new technology [is it] will not require a dark frame for live application or imaging in most cases.”

My blue DS10c is a great camera. You can see my most recent images using the DS10c in my 10/24/2020 blog “Dark Skies in Oklahoma”. My DS10c produces nice images as long as I use darks to reduce the effects of hot pixels. I have to use darks most of the time with my DS10c - too many distracting hot pixels in the southern summers here if I didn't use darks (since my DS10c does not have TEC cooling). I found darks worked best when the darks were captured at similar settings as the image (Exposure, gain, histogram, etc.) This helped reduce the distracting pixels, but took up some of my time that I could have been viewing. That is one reason I wanted to get a TEC camera so I could quickly experiment with different settings to obtain the best image while viewing. With TEC cooling, there are very few hot pixels and average stacking does a pretty good job of reducing the distraction of any remaining hot pixels for near real-time viewing.

I know others with the DS10cTEC have success viewing without having to use darks due to TEC cooling.  So far, I feel like I made the right choice for me to step up to the DS26cTEC to be able to “view” without having to capture and apply darks and getting a larger chip size/FOV and higher resolution.

I am still learning about using the TEC cooling. I use with the recommended default of 0 C (it now shows 32 F on my screen since I changed my preference setting to F). At the end of a session, I turn off the TEC cooling but let the fan run for a few minutes until the temp in the lower right of the screen reaches ambient temp and then I close MallincamSky and turn off power.

So far I have only had a few nights I could try the DS26cTEC out (mainly because of weather).  
Here are images from the DS26cTEC on three telescopes that will give you a feel for the Field of View with this chip size. I will happily note that I did not capture/apply any darks when capturing images shown in this post.
Picture
​My first light with the DS10cTEC was of the moon using my MCR-80 F5 refractor. 
​

Picture
Here is a nice image of Andromeda (M31) on a Newtonian 130mm (5”) F5 reflector. 
​

Picture
This  image of the Pleiades (M45) gives a good idea of the FOV using my 8”               Schmidt-Cassegrain with Hyperstar at F2.
Using the Region of Interest (ROI) feature of MallincamSky is a great way to just view your target area of interest and only average stack the image portion you need. I noticed using ROI makes the stacking process more efficient and faster for the DS26cTEC compared to stacking the full FOV image resolution of 6224x4186. Also with ROI, saved images only include your target region resulting in smaller image files. Combining ROI with 2x2 binning can be a powerful combination with this camera. Due to the small native 3.76mm pixel size, using 2x2 binning still produces an image with good resolution.

The latter part of November we took our RV to a campground with a Bortle 4 rating. Rain was predicted for the first two nights and the third night was questionable. So I just took my easy setup SkyProdigy Mount (with StarSense) and the 130mm Newtonian F5 reflector that came with it. Back in 2014, the second blog post I made on my RemoteVideoAstronomy.com site on 11/17/2014 was titled “A good beginner telescope for RVA” and I used the Mallincam Micro on it. Fast forward to 2020 and I still use this telescope and mount for trips where I “might” have a viewing night. It paid off for the first part of the last night at this campground with a clear dark sky.

So here are some examples of putting an amazing DS26cTEC on the “little telescope that thought it could” at a Bortle 4 campground. These are all on a 5” Newtonian reflector at F5 using the DS26cTEC with 2x2 binning under clear dark skies.

In the following 3 examples the original field of view image is on the left and the image with ROI enabled is on the right. 
Picture
Picture
M27 (Dumbbell) at 3 secs 100 gain 10-75 histogram 10 stacked 2x2 bin
​

Picture
Picture
M17 (Omega/Swan) at 2.2 secs 100 gain 45-200 histogram 22 stacked 2x2 bin.
​

Picture
Picture
NGC8912 (Spiral galaxy) at 5 secs 100 gain 12-100 histogram 10 stacked 2x2 bin.

Here are a couple of examples of just an ROI image using Live High Dynamic Range (LHDR) technique where some settings are changed during the stacking process:
Picture
M33 (Triangulum/Pinwheel) 5 secs 100 gain 20-135 histogram 10 stacked then 25-75 histogram 20 more stacked (LHDR) 2x2 bin
Picture
NGC253 (Sculptor/Silver Dollar) 4 secs 100 gain 64-200 histogram 10 stacked then 64-150 histogram 10 more stacked (LHDR) 2x2 bin
​

Back at home, I captured an image of the Orion Nebula using my Celestron 8” SCT with the Universe Focal Reducer and a 10mm spacer.  There is a little vignetting with the 10mm spacer (another day I tried the Universe Focal Reducer without a 10mm spacer and it greatly reduced the vignetting effect).
​
In the following image I used the LHDR technique at 100 gain 0-255 histogram and varied the exposure from 1s,2s,3s,4s,5s and then changed the histogram to 0-50 for the remaining time. Interesting combination. There were 35 total images average stacked. I did a quick enhancement (<1min) of the final image using Microsoft Photo editor for it to show up better on the web.
Picture
m42 (Orion Nebula) 1s..5s 100g 0-255h..0-50h 35stk

I will have to say I am very pleased with my new DS26cTEC!  I hope to soon try it out more on my 8” SCT with Hyperstar at F2.
1 Comment

Dark Skies in Oklahoma

10/24/2020

0 Comments

 
This October I got a chance to take my Mallincam DS10c Video Astronomy camera, Celestron 8” F10 telescope and Celestron Evolution Alt/Az Mount to Texoma Shores Resort campground in Oklahoma with nice dark Bortle 4 skies.  There were light clouds when we first arrived but good weather most nights and temperatures of around 50-60 degrees. This time of year, we were able to get a site with no one beside us at the edge of a field with good overhead viewing. 
Picture
I was able to leave my telescope set up and covered during the day right next to our RV and car.  As evening approached, I could easily uncover the telescope, perform an Auto Align with my Star Sense accessory and start viewing fairly quickly. I began with a Mallincam Universe Focal Reducer and a 10mm spacer on the DS10c on a diagonal attached to my C8 telescope. 
Picture
My exposure times of deep sky objects were around 1-5 seconds with darks applied and using average stacking of 10 – 60 images for near real time viewing on my laptop screen of what the camera was “seeing” through my telescope.​

The object, exposure, gain, histogram and sharpness settings are noted with each image.  I used video mode (rather than looping mode) since all exposure times were less than 5 seconds. After slewing to a target and adjusting the settings for the best image, I turned on live frame averaging and enjoyed viewing the target details unfold!

In the following deep sky images, the one on the left is what I saw on the screen (no post processing) updating every 1-5 seconds depending upon the exposure setting, and I could zoom the image to see more detail. The image on the right is cropped (like a zoom) from the left image and is a slightly enhanced image of the target. I spent less than two minutes of “post processing” using the regular Microsoft Photos Edit/Enhance/Adjust functions to crop and produced the image on the right to show up better on the web. My camera settings are noted after the target name where s=seconds, g=gain, h=histogram range, vh=the histogram values were varied while stacking for Live HDR effect, srp=sharpness, stk=#stacked with averaging, b=binning value. The distance from earth is listed at the end in lightyears (kly=thousand light years, Mly=million light years)

If you right click on an image and select Open image in a new tab, then click on the new tab you will see a bigger version of the image. 
​
Picture
Picture
M27 Dumbbell (or Apple Core) nebula - 5s 160g 0-255vh 200srp 60stk – 1400ly
Picture
Picture
M17 Omega (or Swan) nebula - 5s 160g 0-100h 200srp 20stk – 4200ly
Picture
Picture
NGC891 Spiral galaxy - 5s 160g 0-100h 200srp 10stk – 32Mly
Picture
Picture
M13 Hercules Cluster - 2b 1.2s 160g 0-100h 200srp 40stk – 23kly
Picture
Picture
M16 Eagle (or Star Queen) nebula - 5s 160g 0-100h 200srp 10stk – 5700ly

​Having noticed Jupiter, Saturn and Mars shining brightly in the sky, after a couple of days I removed the Universe Focal Reducer and attached my 2.5x Barlow to check them out.  These were very short exposures due to their brightness.  Exposure time for planets were 2-10 milliseconds (ms) with 15-38 gain. The following images were “post processed” using the regular Microsoft Photos Edit/Enhance/Adjust functions to crop and enhance the details of the image I captured from the screen.  There are really good planet post-processing applications that can scan through many images and only combine the best ones to produce much better detail.  I just had fun live averaging all images and quickly seeing what I could see.  The full field of view image is on the left and the cropped/enhanced image is on the right. 
​
Picture
Picture
Jupiter - 7ms 13g 0-255h 20stk
Picture
Picture
Mars - 2ms 15g 0-200h 20stk 200srp
Picture
Picture
Saturn - 10ms 38g 0-255h 300srp 40stk 

​Later in the week, I installed my Hyperstar focal reducer which produces a nice wide Field of View at F2.  With this configuration, the Hyperstar and the DS10c camera are at the top end of the telescope.
Picture

As before, the images below on the left are what I saw on the screen (no post processing) updating every 1-5 seconds depending upon the exposure setting. The images on the right are cropped (from the left image) and I only spent 1-2 minutes to quickly enhance the image using the regular Microsoft Photo viewer/editor.

If you compare the following M27 image on the left to the previous one of M27 without the Hyperstar installed you can get a feel for how much the Hyperstar increases the Field of View.
​

Picture
Picture
M27 Dumbbell (or Apple Core) nebula - 1s 70g 15-150h 20stk – 1400ly
Picture
Picture
NGC891 Spiral edge-on galaxy - 3s 80g 50-150h 30stk - 32Mly
Picture
Picture
M82 Bode's (or Cigar) galaxy M82 1s 80g 35-150h 10stk 
Picture
Picture
NGC7293 Helix Nebula - 3s 80g 75-255h 20stk - 790ly
Picture
Picture
NGC253 Sculptor (or Silver Dollar) galaxy - 1s 80g 25-150h 20stk - 12Mly
Picture
Picture
M45 Pleiades (or Seven Sisters) cluster 3s 80g 25-150h 20stk - 430ly
Picture
Picture
NGC7635 Bubble nebula - 3s 80g 40-200vh 20stk – 1400ly

There is not much to zoom into the North American Nebula, so only the full unenhanced image is shown below.
Picture
​NGC7000 North American nebula - 2s 80g 35-100h 20stk - 2600ly
Picture
Picture
M16 Eagle nebula - 1s 80g 50-150h 20stk - 5700ly
Picture
Picture
M8 Lagoon nebula - 750ms 35-150h 20stk - 4300ly
Picture
Picture
M20 Trifid nebula - 850ms 35-150h 200srp 30stk 5200ly

Here is another image of both M8 and M20 in the same field of view.
Picture
M8 & M20 Lagoon & Trifid nebula - 750s 35-150h 30stk 100srp - 4.3kly & 5.2kly
Picture
Picture
M17 Omega (or Swan) nebula - 1s 80g 54-150h 20stk - 4200ly

I wondered why I had difficulty when I tried observing the Whirlpool galaxy one night.  With a little extra exposure time applied I realized why, looked up and saw how low the Whirlpool was on the horizon! 
Picture
M51 Whirlpool galaxy - 1s 80g 40-150h 200srp 40stk - 28Mly ... Tree - about 40 yards

This image of the Andromeda Galaxy particularly stands out in my mind from this trip and nicely shows how big the field of view is with the Hyperstar installed. This is using a 3 second exposure time and average stacking 20 images. The initial image appeared after 3 seconds and then updated every 3 seconds averaging the next image.  This is how it looked on the screen after 1 minute. Periodically I am reminded just how amazing video astronomy is and how fortunate we are to live in a time we have the tech available to see this while there are still dark skies nearby we can go to. 
Picture
M31 Andromeda Galaxy - 3s 80g 50-150h 20stk – 2.5Mly

​We liked being at this nice, quiet out of the way campground, and I really enjoyed the dark skies! It was just a days drive from our home. My wife and I have already talked about planning another trip there next year.
0 Comments

2019 Grand Canyon Star Party (GCSP)  - June 22-29

7/15/2019

0 Comments


​Every year amateur astronomers gather at the Grand Canyon for up to a week as volunteers to show visitors views of the heavenly sights at night through their telescopes.  I went to my first Grand Canyon Star Party (GCSP) in 2017 and returned this past summer in June 2019 for my second time.  The 2019 GCSP was particularly special in that the Grand Canyon had just been officially declared an International Dark Sky Park and had a special ceremony at Mather Point on the first day.  Besides being located in a dark area of the US, the Grand Canyon has worked hard converting their lamps to downward facing dark-sky compliant lighting to maintain dark skies with a minimum of light glare.  This was also the 100th anniversary of the Grand Canyon becoming a national park and the 50th anniversary of the Apollo lunar landing (the Grand Canyon National Park took part in helping train the astronauts in the processes of geology).
 
There were two areas in a large parking lot behind the visitor’s center for amateur astronomers to set up their equipment that were open to visitors from about 8-11pm.  At the entrance to the parking lot there was a roped off area for those of us who used live Video Astronomy where we could show Deep Sky Objects (DSO) in near real time on monitors to small groups at a time.

The center picture below was taken during the day and shows my telescope (orange), table, chair, laptop (in the small tent) and LCD screen for visitor viewing.  The picture on the right was taken at night showing how visitors can easily see on the LCD screen the image as seen by the camera through my telescope in near real time.


Picture
Picture
Picture
The remaining area was for traditional visual viewing where visitors can wait in line at a variety of telescopes to get a chance to look through the telescope and see planets and DSOs.  You see quite an assortment of setups here, including large and unusual!
Picture
Picture
Picture
It is important to keep these two viewing areas separate so that, as visitors move further into the parking lot away from our monitors their eyes can adapt to the dark for better individual viewing through eyepieces. This is not an issue in the video astronomy area since the images we see are on displays that can be easily viewed by several people at a time, even if they have just left the brightly lit visitors center.
 
Here is are daily summaries and screen captures of some of the objects I viewed and discussed with visitors as they passed by.  I sometimes slewed to the same target on various days, so these may not represent the exact images I showed on a particular day. The images for the 27-28 are a different field of view from the others due to the change in the reducer used. The images shown on the left is the full field of view seen by the camera without any enhancements.  The image on the right is a zoomed in section of that image with about 1 minute of enhancement adjustments I made later using the standard Microsoft Photos application, so it shows up better here on the web site. I always like to talk about how far away an object is in light years.
​


6/22/19
​

My wife, Sharon, and I arrived on Saturday and set up our camper in the RV park at the Grand Canyon. This was very convenient since it was just a short drive from there over to the area where we set up our telescopes. I brought my Sky Prodigy 130 (an f/5 Newtonian) for my arrival day since it is very easy to set up and use with my Mallincam DS10c.  I started with the Hercules Cluster, M13, and wound up showing it to many groups for most of the evening.  

Picture

​We wore shorts during the day at the Grand Canyon, and I have to admit that I forgot how quickly the temp drops after sunset and didn’t have enough warm clothing the first night and was shivering as I talked to the last of the visitors.  I brought extra layers I could put on as the evening progressed for the rest of the week!

6/23/19
​

During the day I assembled my Celestron Evolution mount with my Celestron C8 telescope and Hyperstar which makes it a fast f/2 setup. This combined with my very sensitive Mallincam DS10c produced a spectacular field of view (FOV = 2.51 x 1.88 deg)!
Picture
Picture
​M13 – Hercules Cluster  (23 Kly)
​

Picture
Picture
​M81 - Bode’s Nebula  and   M82 - Cigar Galaxy (12 Mly)
​
Picture
Picture
M8 - Lagoon Nebula  (4.3Kly)
​
Picture
Picture
M20 - Trifid Nebula (5.2 Kly)

Most exposure times were 2-5 seconds and I used live average stacking. The Evolution mount is an Alt-Az mount that was much easier to set up than my equatorial mount I had used at the previous GCSP I attended.  The night was very dark with no wind which was great for viewing. I estimated that I showed deep sky objects to about 200 visitors that night.  I didn’t leave until 12:30 am, which was typical for most of the week.
 
​
6/24/19

 
I continued to use the Evolution/C8/Hyperstar/DS10c setup.  It was another good dark night, but it was a little windy.  It was obvious that I was showing “live” images because you could see the image blur a little when the wind blew

Picture
Picture
 NGC6888 - Crescent Nebula (5.4Kly)
​
Picture
Picture
M27 - Dumbbell Nebula (1400 ly)
​

Picture
Picture
​NGC6939  and  NGC6946 -  Fireworks Galaxy  (22 Mly)
​
​

6/25/19
It was cloudy this evening! 
 
So, what do you do when visitors show up? With a regular eyepiece telescope setup, you could talk about your telescope and what you could see if it wasn’t cloudy. But if you have a video astronomy setup, you can show them images on the LCD screen of the objects you viewed the night before. 


Picture
And you can say I saw this image of the Dumbbell Nebula on that display last night through this telescope using that camera. Then you proceed to talk about the object.  There was something special about them seeing the image on the screen and then looking at the telescope and camera that produced it the night before at that very spot that made it real to them.

6/26/19

It was a clear dark night and viewing was good again.

Picture
Picture
NGC7000 - North America Nebula  (2600 ly)
​

Picture
Picture
M17 - Swan (4.2 Kly)

6/27/19

 
During the day, I removed the Hyperstar from the top of the Celestron C8 telescope and put the secondary mirror back in place.  I installed my recently acquired Mallincam Universe 2” 0.5x focal reducer and the Mallincam DS10c on the lower end of the C8 telescope producing an f/5 setup. You can see that the field of view (FOV = 37.8 x 28.3 arcmin) is smaller than the one with the Hyperstar installed by comparing the left image here of the Dumbbell to the one shown under 6/24/19, but this FOV is nice when viewing objects the size of the Dumbbell or the Trifid (i.e. objects appear larger when FOV is smaller). Using a technique that Michael Carnes developed, I tried 5 second exposures but used additive stacking of 4-6 images to produce good near real time images.  I adjusted the settings so the initial image was barely visible.  Then as the additive stacking progressed, a really nice image appeared on the screen.  We had a good crowd come by that Thursday night and I estimated about 250 people came by my site.
Picture
Picture
 M27 - Dumbbell Nebula (1400 ly)
​

Picture
Picture
M20 - Trifid Nebula (5.2 Kly)

6/28/19

This was an interesting day. Jack Heurkamp, whose setup was next to mine in the parking lot, came by our campsite to say when he went to the parking lot my telescope had been blown over and was lying on the ground. I always remove the focal reducers and camera before I leave each night but left the telescope on the mount and placed a cover over it.  Apparently, the cover made a good wind sail and blew my setup over either during the late night or morning.  It must have hit my table on the way down, which slowed it down, and then the mount hit the asphalt first which absorbed the blow.  Jack removed the telescope from the mount for me to protect it. When I got to my site, nothing appeared really broken and I set everything back up and added the Universe focal reducer and the DS10c camera and crossed my fingers.  It was cloudy at first, so we started by showing previous night’s images.  Then it cleared, I slewed to my first object and … all was well!  Here is a nice image of the Whirlpool Galaxy I captured while showing it that night.  We had a really good crowd come by again that night.

Picture
Picture
 M51 - Whirlpool Galaxy (28 Mly)

6/29/19
 
The last night was going to be cloudy, so I just packed up all my gear during the day. A group of us had an enjoyable supper together that evening at the El Tovar.  It was a great way to end the week.
Picture
Tourist stuff…
 
In addition to seeing the great dark skies at the Grand Canyon at night, we also got to be tourists during the day.  Sharon and I were able to walk the rim trail and use the shuttles to see Yavapai Point and Lodge, the Geology museum, Hopi House, Verkampf Visitor Center, Lookout Studio, Kolb Studio, Bright Angel Lodge and some local wildlife.  The days were very pleasant in the 70’s with only 20% humidity (you had to drink plenty of water though). 
Picture
Picture
Picture
Picture
On Tuesday, everyone who was interested rode down to Tusayan for the IMAX film of the Grand Canyon and a pizza lunch. On Wednesday Sharon and I drove to the Cameron Trading Post (about 90 miles away) and stopped at Desert View and climbed the tower on the way back. Thursday morning, we got up at 4am and parked near the Hopi House and walked to the rim to watch the sun rise, and ate breakfast at El Tovar afterwards. On Friday, we drove down to Flagstaff with friends for a tour of the Lowel Observatory.

This was our longest camping trip we have made to date.  We took 5 days traveling from Jackson, MS, to the Grand Canyon, spent 8 days at the Grand Canyon, and 5 days returning home.  It was a great trip!
Picture
Picture


Related Posts...

My custom NexStar Hand Control Holder that I made using my 3D printer worked well! (See my 6/12/19 post).  The Holder attached to a step stool next to me making the Hand Conrol easily reachable.   Also my simple Velcro/fiberboard solution I attached to my monitor worked great, eliminating the glare from the control portions of the screen so all that visitors saw was the actual camera image.  (See my 5/28/19 post)
 
If you are interested, here is a link to my post on how the Hyperstar is mounted on the Celestron C8 telescope:
​
remotevideoastronomy.com/blog/hyperstar-setup-guidelines

For the 2017 GCSP I used a Mallincam Xterminator II with a NexGen F3.3 reducer on the Celestron 8" telescope mounted on an Equatorial mount. I did not have any trouble that year with the wind, probably because the heavy weights of the equatorial mount made it more stable.  (See my 6/30/2017 post).

​ 
0 Comments

DIY - Use a 3D Printer!

6/12/2019

0 Comments

 
When working with telescopes, mounts, cameras, laptops and supporting equipment for Video Astronomy, you may find you get into a "Do It Yourself" mode when configuring and optimizing your setups.  We now have a new technology available to assist us with our DIY projects – 3D printing!  A friend of mine got into 3D printing a couple of years ago and has often encouraged me to consider it for astronomy use.  At first I was not sure how I could use it, but as prices continued to drop and the technology easier to work with, I decided to  get a Monoprice 133012 Select Mini Pro 3D printer with Auto Leveling Heated bed from Amazon for $199.99 and a 1kg Spool of 1.75mm Hatchbox Black PLA 3D Printer Filament for $22.99.  That was all I needed to get started.
Picture

It was easy to set up and print the sample “Cat” 3D object that came on the supplied SD card without even connecting it to a computer
Picture
The SD card also had tools for converting 3D objects to a 3D gcode print file through a method that “slices” the 3D object into thin data layers that can be ‘Printed” from the base up to produce your 3D object.  I then found out that there is an even easier tool available in Windows 10 called 3D Builder you can use to build 3D objects and print them without worrying about gcode files, etc.  You attach your 3D printer to your computer by a USB cable and it is just configured as another printer on your Windows system.  There is a vast library of objects you can download from a site called Thingiverse.com and modify them as needed.  If you download an object and open it with 3D Builder, you can simply select 3D Print, select the type of filament you have (e.g. PLA), make sure your 3D printer is selected and click on print.  After a “period of time” you have your 3D object sitting on your print bed.  The period of time is based on the size and complexity of the 3D object, and since it prints by building up a layer at time, your 3D object can take a couple of hours or so to print.  The cat took about 3 hours to print.

You learn to start it printing, and then check back on it every once is awhile to make sure it is still printing OK. I also realized that this filament spool will last me awhile, which is good, because your printing will sometimes fail.  Maybe your object doesn’t stick to the bed well enough because the plate temp is not high enough (or is too high) and your object moves part way through the print (turning on Raft Supports helps with this).  Or maybe your nozzle temp is too low and the filament jams.  Check the doc that comes with the filament you buy and make sure your nozzle (Extrusion temperature) and plate (Build Platform temperature) settings are in the recommended range (check Advanced/Temperature settings when getting ready to print). There are a lot of YouTube videos for hints on getting started with 3D printing.

So, I got a 3D printer, printed the Cat, found Thingiverse.com and searched on Astronomy.  There are lots of mounting brackets available, which gave me an idea for something that would be very useful to me immediately.  I did a search on Celestron and found a NexStar Hand Control Holder.  Next week we leave for the GCSP where I will have my laptop and monitor on a table near my telescope.  My “Remote Video Astronomy” location is only a few feet from the telescope, but the regular Hand Control Holder clips onto a leg of the telescope. It would be a lot more convenient if the hand control was right next to me for easy slewing to targets and making adjustments.  I could use SkyFi with SkySafari on my phone to control the mount, but small adjustments are just easier to make with the hand controller. I have a coiled extension cable I can use with my hand controller.   What if I could have a Holder for it that clipped onto something right next to me?  Maybe onto my small 2 Step Ladder?  Its legs are slanted like the tripod so the viewing angle would be perfect, but its legs are only 1” in diameter instead of the bigger size of the bulky tripod legs. 

So I downloaded the NexStar Hand Control Holder from Thingiverse.com and clicked on it and it appeared in Windows 3D Builder.
Picture

​Then I split the clip from the holder portion of the 3D object.
Picture
I reduced the size of the clip until its inside diameter was 1mm less than 1” so it would be a snug fit when clipped onto the step stool leg, and I stretched it upward to make it taller to hold well when clipped on.
​
Picture
I then “stuck” it back onto the holder part by moving it back to the holder and merging the two objects
Picture
This was fun!  I felt like I was using virtual Play-Doh. I turned on my 3D printer, attached its USB cable to the computer and clicked on 3D Print. What was virtual now becomes real!
Picture

​Four hours later I had my customized Hand Control Holder ready to clip onto my small 2 Step Ladder.
Picture
Picture

​That night I tried it out, and it worked great having my Hand Control “at hand” when needed.  I could select and slew to objects without even removing it from the holder, yet still easily remove it to push buttons for minor adjustments while watching the monitor.
Picture

Here is a short video clip of a portion of the 3D printing process in action. 

Click Here to view video.
​
Note: It does not actually print this fast – this is a time lapse video which is more entertaining to watch.  😊

​​
0 Comments

DS10c LHDR averaging – Part 2

12/5/2018

3 Comments

 
Yesterday, I repeated my Live High Dynamic Range (LHDR) testing with the DS10c, this time using a Celestron 6” Telescope with the Optec NextGen Maxfield 0.33X reducer, which produced about a f/3.3 setup.
​
Picture
As I noted in my prior post, this LHDR technique only works in video mode since you adjust the gain while average stacking (you cannot change the gain when looping in trigger mode). Because video mode only supports exposure up to 5 seconds, you need a fairly fast setup.  I was able to use a 3 second exposure setting at this f/3.3 setup. I tried it both without binning and with binning.

As before I used three gain settings of 4, 40 and 80 without binning. I set the gain to 80 (my max gain settings) and adjusted the histogram lower setting to 7 to slightly darken the background.  I left the upper setting at 255. I changed the gain to the low setting of 4, set the number of frames to average to 10 and turned on Planet averaging with align. After 15 output frames I moved the gain from 4 to 40.  Note that the key is monitoring the number of output frames, not the number of input frames. After 15 more output frames (30 total) I moved the gain from 40 to 80. I let it run for 30 more output frames at gain 80 (60 total output frames) resulting in the following image.


3 second exposure, histogram 7-255, 15 averaged output frames at gain of 4 plus 15 averaged output frames at gain of 40, plus 30 averaged output frames at gain of 80 using live stacking.
Picture
I didn’t get as much detail at this point as I previously had using my 8” with Hyperstar at f/2.  So I decided to try using bin 2, leaving all the settings the same and repeating the process, but changing the gain from 4 to 40 after 5 output images, and from 40 to 80 after 5 more output images, and let it run for 10 more output images (20 total output).  The final captured image is shown below.

Bin 2, 3 second exposure, histogram 7-255, 15 averaged output frames at gain of 4 plus 15 averaged output frames at gain of 40, plus 30 averaged output frames at gain of 80 using live stacking.​

Picture
I was pleased with the results of using bin 2 with 3 second exposure on a 6” telescope at f/3.3 using the LHDR process with 4, 40 and 80 gain settings.

Even though this is somewhat “like” an astrophotography process averaging frames with different settings, it still has the “live” feel that makes Video Astronomy so much fun.  I get to see results in near real time in amazing detail and color that I never could see with these eyes of mine looking through a telescope! And you can experiment with different settings and quickly see the results.
​
To compare this result to using the LHDR process on a 8” telescope with Hyperstar operating at f/2 see my prior blog post at

remotevideoastronomy.com/blog/ds10c-live-hdr-averaging


12/12/2018 UPDATE: 

Matt Harmston has done some outstanding work expanding the use of this LHDR technique!  He found you could in fact make use of LHDR techniques while using trigger mode.  This opens up LHDR to anyone since video mode is Not a requirement, and thus it is no longer limited to under 5 second exposures.

He found that while using trigger mode you can stop looping without stopping averaging, change the gain, and then restart looping right where you left off still averaging with the prior image!  The key is to not disable averaging during this process.  I have found it actually makes it somewhat easier since you can stop looping at a certain point and take your time to change the gain (and/or other settings).  Then you just turn looping back on and the average stacking continues.  You can do this as many times as you like to continue developing a LHDR image!    Instead of changing the gain, you can also do this varying other settings like the exposure time, histogram, gamma, contrast, etc.
3 Comments

DS10c Live HDR averaging

11/27/2018

0 Comments

 
​Some Deep Sky Objects have a wide range of detail, but present a challenge.  For example, you can see the Trapezium stars in the core of the Orion Nebula if you use a short exposure.  To see the fine edge detail you need to use longer exposures, but that “blows out” the core and you can no longer distinguish the Trapezium.  This can be overcome using a High Dynamic Range technique by capturing several images of varying exposure and post process them later to combine them and produce a final image with a good range of detail.  It would be nice to see this in real time though.

I tried something interesting last night that is somewhat like a Live High Dynamic Range (LHDR) averaging technique.  I was using my Celestron 8” with Hyperstar with the DS10c aimed at the Orion Nebula. The 3/4 moon was rising so I was also using a Baader Planetarium Moon and Skyglow filter.  The key settings I used that remained constant were: 1 second exposure (video mode), histogram 65-255 and sharpen at 100. I did not use binning. I started with gain at 4 and turned on planet averaging with align. After it output 12 frames I moved the gain slider up to 40 and let it continue averaging.  After it averaged 12 more frames I moved the gain slider up to 80 and let it continue.  Looking at the screen after it averaged 12 more frames I decided to let it just continue averaging at gain 80.  After it had averaged 19 more frames I captured the final averaged image.  I took snap images each time I changed the gain so I could show how the image “developed”. No post processing was done on any of these images of M42.

​

Gain of 4, 1 second, histogram 65-255, 12 averaged frames using live stacking.
Picture
Gain of 4, 1 second, histogram 65-255, 12 averaged frames plus 12 averaged frames at gain of 40 using live stacking.
Picture
Gain of 4, 1 second, histogram 65-255, 12 averaged frames plus 12 averaged frames at gain of 40, plus 12 averaged frames at gain of 80 using live stacking
Picture
Gain of 4, 1 second, histogram 65-255, 12 averaged frames plus 12 averaged frames at gain of 40, plus 12 averaged frames at gain of 80, plus 19 additional frames at gain of 80 using live stacking
Picture
Here is a  screen shot of the MallinCamSky screen when it had output a total of 55 frames
Picture
Note: you can change the gain or exposure while averaging when using video mode with the DS10c.  You cannot dynamically change the gain or exposure when trigger mode is on and looping. You can only go up to 5 second exposure in video mode, but I usually use less than 5 second exposures due to my setup and the sensitivity of the DS10c.
​

The following image on the left is a cropped version of the final frame using this LHDR technique. This LHDR image shows the stars in the core of the Orion Nebula and nice detail of the surrounding area. 
Picture
Picture
On the right is a cropped version of an image capture using gain of 4, 1 second, histogram 65-255, and frame averaging without using this LHDR technique.  You can see the outer fine detail, but the core is overexposed and you cannot distinguish the Trapezium like you can in the LHDR image on the left.
​
The Miloslick software for the Xtreme/Xterminator cameras has a HDR mode for objects like the Orion Nebula that can automatically vary the exposure time over several frames combining them in real time to produce a nice detail in the image viewed on the screen.  I could have varied the exposure time instead of the gain during average stacking in video mode in the MallinCamSky application, but chose to vary the gain because I could get a much wider dynamic range in a short period of time by just varying the gain of the DS10c and leaving the exposure time at 1 second. I had to make the changes by hand during averaging with MallnCamSky, but it worked!

​
0 Comments

So close, and so far away

10/18/2018

0 Comments

 
I encountered a surprise on my screen while using my DS10c camera on my 8” telescope with Hyperstar installed while at Crossing Creeks in Georgia.  Early in the evening around 8:30pm (DST) when I  tried to view  the Sculptor Galaxy, I realized my mount had slewed to very low on the horizon.  So low, that I was astonished to see a portion of the nearby tree line in the lower part of the image.  Michael Carnes was also at Crossing Creeks trying out his DS16c on his 8” and we were set up next to each other.  As I commented on the trees in my image, Michael said … and there is the Sculptor Galaxy!  Sure enough, there it was just above the tree line. 
​
Picture

​My unusual Sculptor Galaxy + Trees image was captured when the telescope was in fact aimed at about 7 degrees above the horizon. No wonder there were trees in the image.  But I never thought I would see nearby terrestrial objects and a galaxy that is 12 Million Light Years away in the same telescope image!
​
0 Comments

DS10c on C8 with Hyperstar

10/17/2018

5 Comments

 
New Equipment

Earlier this year I bought a Starizona Hyperstar lens for my Celestron 8” telescope which produces a wider field of view and changes my f/10 telescope to about f/2.  I also purchased a MallinCam DS10c video astronomy camera that uses a larger chip format (almost 22mm) than my previous cameras.  It has no amp glow, uses an ultra low noise sensor and has a HCG (high conversion gain) mode that increases sensitivity.  Unfortunately the weather at home and my schedule this year have kept me from being able to do any serious observing with this new equipment. 

I finally got a chance to use my DS10c on my Celestron 8” with the Hyperstar reducer lens! Recently while I was in Crossing Creeks RV Park in Georgia, I had two consecutive days to fall in love with this equipment combination. In some cases I was able to use 1 second exposures. Yep, 1 second!  Since there is no amp glow with the DS10c, I did not have to use darks, and the short exposure time minimizes effects of warm pixels. I did use MallinCamSky's live average stacking of 10 frames to reduce noise and smooth the image. I also used 2 and 3 second exposures in a similar manner as well. I was able to see results very quickly (1-3 seconds), and before turning on averaging, I tweaked the histogram in near real time like I was used to with the MallinCam Xtreme/Xterminator. Of course the field of view was much larger than the Xterminator, and I could zoom in on the targets of interest within the DS10c images with good detail.

I used a USB3 powered extension cable to extend the camera control to a “remote” location under a camper awning (which kept the dew off the laptop).  I should also note that I used my more portable Celestron Evolution Alt-Az mount with my Celestron StarSense Auto Align device and hand controller for these evenings. I controlled the Evolution mount over Wi-Fi using SkyFi at the mount and SkySafari on my iPhone under the awning.


Two Viewing Sessions
​

All image captures were with HCG on and gain at 80 (the midpoint). Hue was set to 13 and saturation at 181 for most images.  All images were captured with live average stacking of 10 frames. The object, exposure time and histogram settings at the time of capture are noted.  All other settings are at default values.  I used Video mode (rather than looping mode) for these images since all exposure times were less than 5 seconds. After adjusting the settings for the best image, I then turned on live frame averaging and enjoyed viewing the target details!

In the following images, the one on the left is what I saw on the screen (no post processing) updating every 1-3 seconds depending upon the exposure setting, and I could zoom the image to see more detail. The image on the right is cropped (like a zoom) from the left image and is a slightly enhanced image of the target of interest (I spent less than two minutes of “post processing” later using only Microsoft Photos Edit/Enhance/Adjust to produce the image on the right to show up better on the web).


M27 Dumbbell Nebula, 1 second exposure, histogram 50-150
Picture
Picture

M33 Triangulum Galaxy, 3 second exposure, histogram 50-150 ​
Picture
Picture

NGC891 Spiral Galaxy (edge-on), 3 second exposure, histogram 50-150
Picture
Picture

M8 Lagoon Nebula (with M20 Trifid Nebula at top right), 1 second exposure, histogram 35-150

Picture
Picture

M16 Eagle Nebula, 1 second exposure, histogram 35-150
Picture
Picture

M82 Cigar Galaxy (with Bode’s M81 below it), 1 second exposure, histogram 35-150
Picture
Picture

M17 Omega Nebula, 1 second exposure, histogram 35-150
Picture
Picture

NGC6888 Crescent Nebula, 3 second exposure, histogram 50-255
Picture
Picture

NGC7293 Helix Nebula, 3 second exposure, histogram 38-255
Picture
Picture

NGC253 Sculptor Galaxy, 1 second exposure, histogram 20-200
Picture
Picture


FYI:  These next three objects were so large it almost didn’t make sense to “zoom” in any.  But I did anyway.


M45 Pleiades, 3 second exposure, histogram 96-25
Picture
Picture

NGC7000 North America Nebula, 3 second exposure, histogram 70-150
Picture
Picture

M31 Andromeda Galaxy (with M110 above it), 2 second exposure, histogram 30-175
Picture
Picture

​Viewing Fun

Some portions of each night were clearer than others and there was occasional ground fog to contend with, but all in all it was great fun seeing these objects with my new equipment in very near real time!  Viewing night sky objects through an eyepiece in “real time” is still a great experience, but you are limited by what the human eye can see at night.  I remember when I first discovered video astronomy it opened up a whole new viewing experience for me, seeing objects through my telescope in color using a camera in a way I couldn’t possible see in an eyepiece.   I feel like this new equipment combination which has a very star-rich wide field of view enabling less than 5 second exposures has taken video astronomy to another level for me. As I have said before, video astronomy is like a viewing session.  It is not about capturing perfect pictures --- it’s about seeing many amazing images of night sky objects appear on your screen in near real time. And you can capture images like these to remind you of what you saw, and later have more fun looking at details you may have missed.


5 Comments

Celestron Evolution for RVA

4/3/2018

0 Comments

 
A few years back I began my re-entry into Astronomy by purchasing a Celestron 8se telescope and mount. That same year I discovered Video Astronomy and was hooked! Although the 8” telescope worked well for Video Astronomy, the 8se mount tracking limited it’s use for Remote Video Astronomy (RVA). I then upgraded to a Celestron CG-5 German Equatorial Mount and continued to use the 8” telescope, which was a great combination for Video Astronomy. Later I wanted a more portable mount, so I purchased a Celestron SkyProdigy 130 with built in auto align capability.  Both the CG-5 and the SkyProdigy mounts have served me well over time for Remote Video Astronomy.
​

I love the quick setup (and pack up) of the SkyProdigy Alt-Az mount, and have successfully used a MCR-80 ED, a Coronado PST (solar) and a Celestron 5” telescope on it, but it would not handle my 8” telescope.  I decided to get a Celestron Evolution to be able to use my 8” telescope on a sturdy, portable Alt-Az mount. It also has a built in Lithium battery and Wi-Fi mount control, both of which are great for RVA.  The Evolution is available with either a 6”, 8” or 9.25” telescope.  I already had an 8” telescope and decided to get the Evolution 6 since I could also use its 6” telescope on the SkyProdigy mount.
​
Picture
As I unpacked my Evolution 6, I was reminded of my experience of learning to use my original Celestron 8se that led to the writing of my first book (amazon.com/author/jimmeadows). Several of the things I described in that book are also applicable to the Celestron Evolution (e.g., What do I need to keep in mind when I use SkyAlign).  

Below are some guidelines when beginning to use the Evolution mount, some of which are applicable when first using any new mount and telescope.  Take time to learn each of the features one at a time until you are familiar with its function.  Trying to do too much all at once can lead to frustration.  Here is a suggested learning order:


Part 1 – Setup and Operation

Unpack and Set up

Set aside some time to initially unpack and set up your equipment for the first time inside as described in the instruction manual. 
​​
Picture
Getting the mount centered on the tripod can be a little tricky.  After you do it once, carefully loosen the quick release knob, remove the telescope, and then repeat removing and reinstalling the mount (without the telescope) onto the tripod a few times using the mounting bolts to get the hang of attaching the mount to the tripod. 
​
Picture
Picture
Picture

​Use of clutches
​

The clutch knobs on the Evolution are great!  You can easily engage/disengage the altitude and azimuth clutches separately using the easily gripped large orange round clutch knobs.
​
Picture
Picture
 I really like that you can freely rotate the mount by hand when the azimuth clutch is disengaged.  Don’t forget to tighten the azimuth clutch in the center of the mount after rotating the mount by hand.  Also once you perform an alignment, don’t disengage either of the clutches or else you will lose your alignment.

​
Moving telescope with hand controller

There should be a good charge on its internal battery right out of the box so you can turn it on and practice moving the telescope in all directions using the hand controller.  While you are inside it is a good time to get familiar with the hand controller screens.  If you have used a Celestron hand controller before, most of it will be familiar.  Unfortunately the manual has “Getting Started – Using Your Smart Device” before “Getting Started – Using the NexStar+ Control”. Its fine to load the Celestron SkyPortal on your smart device (phone, tablet, etc.) and try out the Wi-Fi while you are inside (use Connect only).  However, I highly recommend using the hand controller for your first viewing at night so you focus on getting used to your new mount and telescope.


Adjusting the Finderscope

The manual says that adjusting the finderscope is best done at night because the LED dot will be difficult to see during the day.  I recommend doing this late in the day before it gets dark.  It is a lot easier to get the findersope lined up where the telescope is pointing at something in the distance while there is still daylight.  Turn the LED brightness up to full and you should be able to see it OK, and you can see and use the adjustment knobs easier.  By the way, I prefer using a Telrad Finder Sight rather than the smaller LED dot finders that typically come with telescopes.


Hand control SkyAlign

I recommend you perform your first SkyAlign using the hand controller.  It is easier to use its buttons to move the mount than using the virtual buttons of SkyPortal.  The hand controller buttons respond immediately when pressed or released.  Sometimes there are delays with the SkyPortal virtual buttons.  The SkyPortal buttons are OK once you get used to using them and you are familiar with how the mount operates.


Viewing objects using hand control
​
Once aligned, you are ready to begin your viewing session.  Although I use Video Cameras often, I like to start a new setup with an eyepiece until I get the feel of the mount and its operation. Refer to the manual for the various ways you can select and automatically slew to a target. I often use the Solar System to select the Moon, the Stars button to select from the Named Stars catalog, and the Deep Sky button to select from the Messier catalog.
​
Picture
Using the hand controller for your first visual viewing also gives you a feel for any minor drift that may occur after slewing to an object due to play between the gears (backlash).  This is particularly important when you later start using a camera. 
​
 
Part 2 – Advanced Operation

Connecting to mount Wi-Fi
​
Something I observed about my mount that differed from my instruction manual is my mount Wi-Fi name was Celestron-## rather than SkyQLink-##.
Picture
I do agree with the instructions that you should familiarize yourself with connecting to the Wi-Fi and application during the day before using it at night.  Be sure to use just the Connect option while trying it out during the day (not the Connect and Align).


Moving telescope with SkyPortal Wi-Fi

As I previously noted, there is a learning curve when beginning to use the virtual arrow buttons of the SkyPortal app to point your telescope. You also need to make use of the slider to adjust the speed to high when moving to different sky positions, and much lower when attempting to center a star or target. I also found when holding the virtual left arrow button down near the edge of an iPhone you can accidentally switch to a different application and lose your connection to the mount’s Wi-Fi (just restart the app and select Connect). Note: This was less likely to happen if I pressed the left arrow using my right hand.  For fine adjustments I tend to tap the virtual buttons rather than holding the button down (i.e. tap it a few times rather than press and hold).
​

SkyPortal SkyAlign

There are two ways to connect to the mount using SkyPortal.  “Connect And Align” initiates an alignment procedure, while “Connect” just establishes a connection to the mount without affecting the alignment.
Picture

Connect is useful if you lose your Wi-Fi connection due to walking away from the mount and you need to reconnect when you get back. When you select Connect And Align you use the arrows on the screen to manually slew to a bright star to begin your alignment.  If you overshoot when manually slewing toward a star, move the Rate slider to the left to reduce the speed to then make it easier to center the star. You will also learn when using the high rate to stop pressing the arrow button as you  get near the target object to reduce overshooting. One advantage to using the SkyPortal SkyAlign is you do not have to set the time and location since that is supplied by your device.   NOTE: Connect And Align will erase any prior alignment, so don’t use this if you have already aligned the mount.


Observing objects using SkyPortal

SkyPortal has several ways to select objects as described in the manual. It is a very nice way to visually see, select and slew to a target.  NOTE: If you have used the SkyPortral SkyAlign process, do not use the hand controller to select and slew to an object since it does not have access to the alignment performed by using SkyPortal. Likewise do not perform an alignment using the hand controller, then select Connect in SkyPortal and try to slew to an object since SkyPortal does not have access to the alignment in the hand controller.  It is OK to use the arrow buttons on the hand controller to fine tune your position even if you have performed a SkyPortal SkyAlign, just don’t use the GoTo function of the hand controller.


Checking Battery Status

When you are connecting by Wi-Fi to the mount, tap the settings gear icon to the left of the Rate slider.  The current Battery Status level will be displayed at the top right under Scope Setup. This is useful if your mount seems to be slowing down and you suspect the battery is getting low.  If it is low, you can plug the charger into the mount to maintain alignment and complete your viewing session.

In general, if I am going to be next to my mount I prefer to use the Hand Controller to align my mount and slew to objects rather than using SkyPortal. I can still use the SkyPortal Connect function though just to check the battery level.  


Adjusting Settings

There are several settings you can adjust using either the hand controller or SkyPortal.  The ones I find particularly useful are Tracking Rate, Altitude Slew Limits, Lighting and sometimes Anti-Backlash.


Adding a Camera & Cable

Once you have had some successful visual viewing sessions and are comfortable with your new mount and telescope, it is time to add a good Video Astronomy camera to see much more in near real time than you can see with your eye.  When adding a camera I like to try it out during the daytime to adjust the telescope balance as needed with the camera and cable(s) installed.  It also gives me time to find the best way to secure the cables to avoid affecting the alignment while the mount is slewing.  With the Evolution, I usually use a MallinCam Video Astronomy camera that has a single USB cable such as the DS2.3+ or DS10c. If I go inside, I connect the camera's USB cable to an active USB extension cable to control the camera and view the image remotely.


Reducing Backlash

I have noticed a little drift immediately after slewing to an object, which is more noticeable when using a camera.  I found this can be reduced by balancing the telescope with the camera in place before you begin.  Loosen the quick release knob slightly so you can slide the telescope forward or back as needed and retighten.  If I still see some slight drift after slewing to an object, rather than waiting for the gears to take up the slack I simply use the arrow controls to move the mount slightly in the direction opposite to the observed drift and the image will quickly stabilize.  You could also try adjusting the hand controller backlash values, but I prefer to manually take up the slack as needed. Once the tracking is fully engaged, the Evolution works well for the short exposure times used for Video Astronomy with an 8” telescope and camera.


Adding StarSense AutoAlign

If you can afford to add Celestron’s StarSense AutoAlign it will simplify your life!  After adding a quality Video Astronomy camera, I can highly recommend getting the StarSense AutoAlign.  It eliminates trying to peer upward though a finder at awkward angles to get a good centering of a star.  This is especially beneficial when using a camera.  I also get a more accurate alignment when I use  the StarSense AutoAlign.  Even though you can use StarSense with SkyPortal, I prefer using the StarSense Hand Control to perform the auto align process (just plug in the StarSense Hand Control in place of the Evolution Hand Control). You can have your camera in place at the beginning of a session, turn on the mount, initiate an auto align and be ready to start viewing in about 4 minutes.


Adding SkyFi

Yes, I know the Evolution has built in Wi-Fi.  So why would I use an external Wi-Fi device like SkyFi? I like using a Hand Controller and StarSense AutoAlign to begin when next to the telescope.   Then I turn on SkyFi and can use SkySafari on my phone or tablet to select and slew to objects, but can also still use the StarSense Hand Control to select and slew to objects. (I should also note that the Evolution Hand Control has a different connector at the bottom which would require a different cable to connect to SkyFi than what I normally use).  SkyFi seems to have a stronger Wi-Fi signal than the mount, and I can go inside and control my mount using SkySafari using my Remote Video Astronomy setup.  It is nice how the Hand Controller and SkyFi can both fit on the top of the mount base and rotate with it without any cord wrap issues.


My Evolution 8” Setup
​
Here is my complete setup using my 8” telescope on the Evolution mount for Remote Video Astronomy.
​
Picture
0 Comments
<<Previous
Forward>>

    Author

    Astronomy was my favorite hobby many years ago, but was gradually set aside due to work, family and life in general.  In recent years I resumed my hobby looking forward to using the new technology that is now available.  Then I discovered Video Astronomy.  Then I learned how to do it Remotely.  I wrote some books, and decided to set up this web site to continue to pass on what I learn.

    ​Jim Meadows

    Questions or comments?  Email me at:
    ​[email protected]

    NOTE: If you use Microsoft Edge and clicking on an Archives or Categories link below does not work, please try an alternate browser (e.g. Chrome).

    Archives

    February 2025
    August 2024
    April 2024
    February 2024
    October 2023
    June 2023
    September 2022
    May 2022
    May 2021
    December 2020
    October 2020
    May 2020
    March 2020
    February 2020
    July 2019
    June 2019
    May 2019
    January 2019
    December 2018
    November 2018
    October 2018
    April 2018
    March 2018
    November 2017
    October 2017
    September 2017
    August 2017
    June 2017
    April 2017
    March 2017
    January 2017
    December 2016
    October 2016
    August 2016
    July 2016
    May 2016
    April 2016
    March 2016
    February 2016
    January 2016
    December 2015
    September 2015
    August 2015
    June 2015
    April 2015
    March 2015
    January 2015
    December 2014
    November 2014

    Categories

    All
    Accessories
    AGc / AGm
    Articles By Others
    Astrophotography
    Auto Align
    Build
    Commentary
    DS10c
    DS2.3+
    DS26cTEC
    DS8300cTEC
    Eclipse
    Focal Reduction
    Hyperstar
    LHDR
    LPP
    Mallincam Micro
    MallinCam Netbook Kit
    MallinCamSky
    MallinCam X2 / XT
    MallinCam Xterminator
    Miloslick
    Mmec Software
    Permanent
    Pier
    Portable
    Pro Dob 2
    RASA
    RVA
    SkyBT
    SkyFi
    SkySafari
    SkyShed
    Software
    Solar Viewing
    Star Parties
    Starter Telescope
    Video Astronomy

    RSS Feed

Web Hosting by Domain.com