I have been planning a SkyShed Observatory for my backyard and have completed my first step! On April 29-30 I installed a 14” x 4’ concrete pier footing that is buried 3.5’ into the ground leaving 6” above ground with 4 embedded bolts on top. The following weekend I put my 8 5/8” metal pier (purchased from SkyShed) onto the embedded blots, leveled it and bolted it down. I also bolted my AVX mount on top and added my 8” Celestron with my DS10c and Universe focal reducer and gave it a successful test drive.
I followed SkyShed’s excellent pictorial documents to install the concrete footing and set up the SkyShed Metal pier. Here is how I set up a pier in my backyard in 10 “easy” steps:
1. I bought a 14” diameter Sonotube and cut a 4’ long piece for the concrete pier. I also cut a 6” long piece to place on the ground to simulate and visualize what the above ground portion would look like.

2. I cut a 12”x12”x1” piece of wood to make a template to make it easy to insert the 4 J-bolts onto the top of the concrete pier as described in their instructions. Right after the Sonotube is filled with concrete, this is placed down into and rests on top of the Sonotube and is left undisturbed for 3 days.

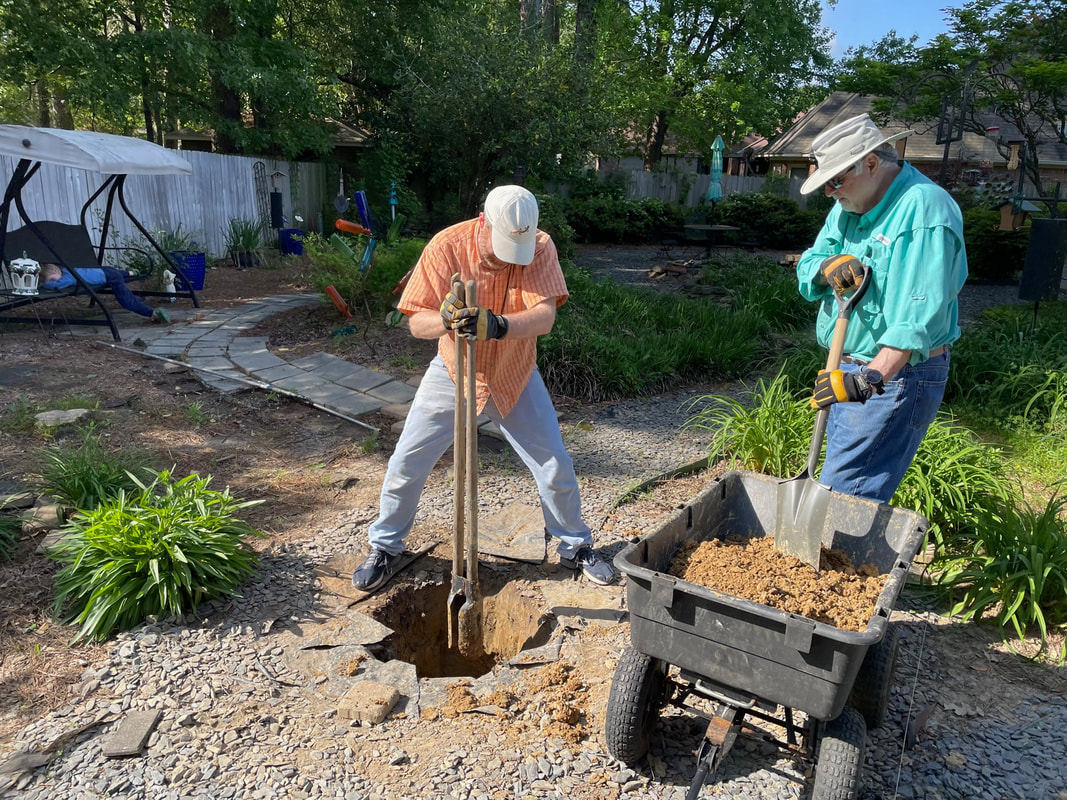
3. I started digging the hole for the Sonotube on a Friday afternoon and created one 2’ deep. Saturday morning I was joined by 2 friends with a post hole digger and we dug until the hole was 3.5’ deep. We put the 4’ long Sonotube down in the hole, used a long level across the top of the Sonotube to level it and backfilled around it with some of the available dirt, checking it periodically to make certain the top remained level.

4. Using a wheelbarrow, hoe, shovel, eleven 50 pound bags of Quikrete plus water, the Sonotube was filled with concrete up to 1” from the top of the Sonotube.

5. I then carefully placed the wood template with 4 J-bolts down into the concrete and rested it on the top of the Sonotube. I then put a tarp over it and used bricks to keep it in place in case it rained during the curing time (it did rain). You should wait at least 3 days. I waited until the next weekend.

6. The following Friday I took the top nuts off the bolts and removed the wood template. I also removed the portion of cardboard Sonotube that was above ground.

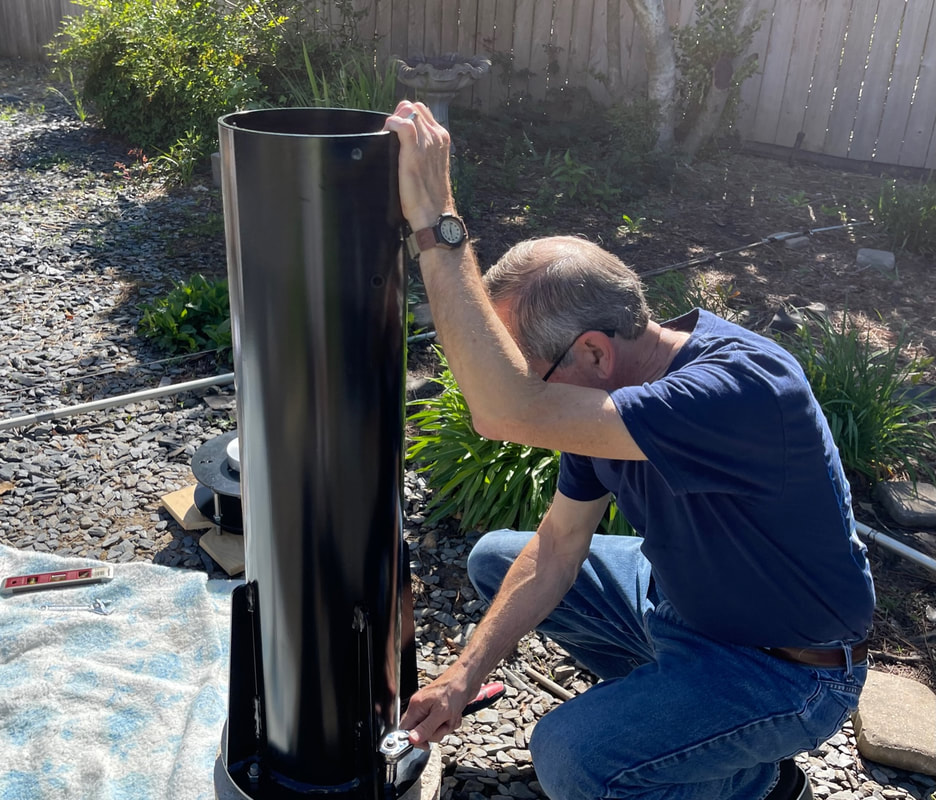
7. The next morning I took the metal cap off the metal pier to make it easier to handle as recommended by the instructions. One of my friends joined me to help lift the metal pier onto the bolts and rest it on the washers. With a level across the top, I adjusted the lower nuts until the metal pier was level and then put the top nuts on and tightened them down.

8. I had bought two 50 pound bags of play sand from Lowes, which I used to fill the 3 foot long metal pier. (Note: first place a piece of duct tape over the small hole in the bottom to keep sand from leaking out).

9. I then put the cap on and leveled its top as described in the instructions. I had purchased an AVX “doughnut” adapter with my SkyShed metal pier. I bolted this onto the top of the pier cap.

10. I was then able to place my AVX mount onto the adapter and to bolt it into place using a 1.5” bolt up through the center hole of the adapter.

My pier and mount was now in place ready for whenever I want to use it!
I wanted to use it, so my first test was that evening, which actually went well. I attached my telescope, camera, StarSense, cables, etc and used my laptop on a table next to the telescope.
I wanted to use it, so my first test was that evening, which actually went well. I attached my telescope, camera, StarSense, cables, etc and used my laptop on a table next to the telescope.

Due to lots of prior planning, I could just see Polaris over the top of my backyard garage in order to perform a rough polar align looking through the AVX polar scope.
This was followed by an Auto Align using the StarSense. I selected Arcturus, it whirred and stopped, and there it was on my laptop screen (out of focus of course). After focusing I just selected the brightest object in the sky that night, a half full Moon, and enjoyed checking it out.
This was followed by an Auto Align using the StarSense. I selected Arcturus, it whirred and stopped, and there it was on my laptop screen (out of focus of course). After focusing I just selected the brightest object in the sky that night, a half full Moon, and enjoyed checking it out.
 |  |
I decided to quit while I was ahead and removed all the equipment, leaving the AVX mount in place. I have a very good telescope cover I can keep over the pier and mount when not in use.

Then I declared victory, finished packing up and went inside.
Now for the rest of the story
I had steps 1 & 2 ready in January, then I waited for a good weekend to dig and pour my concrete pier. And waited. And waited. And waited…until it was warm, no rain, and had some friends that could assist. So, I had a lot of time before hand to spend with my 6” high simulated above ground sonotube and 10’ poles to simulate a 10’x10’ SkyShed in various places and make sure I could see Polaris.
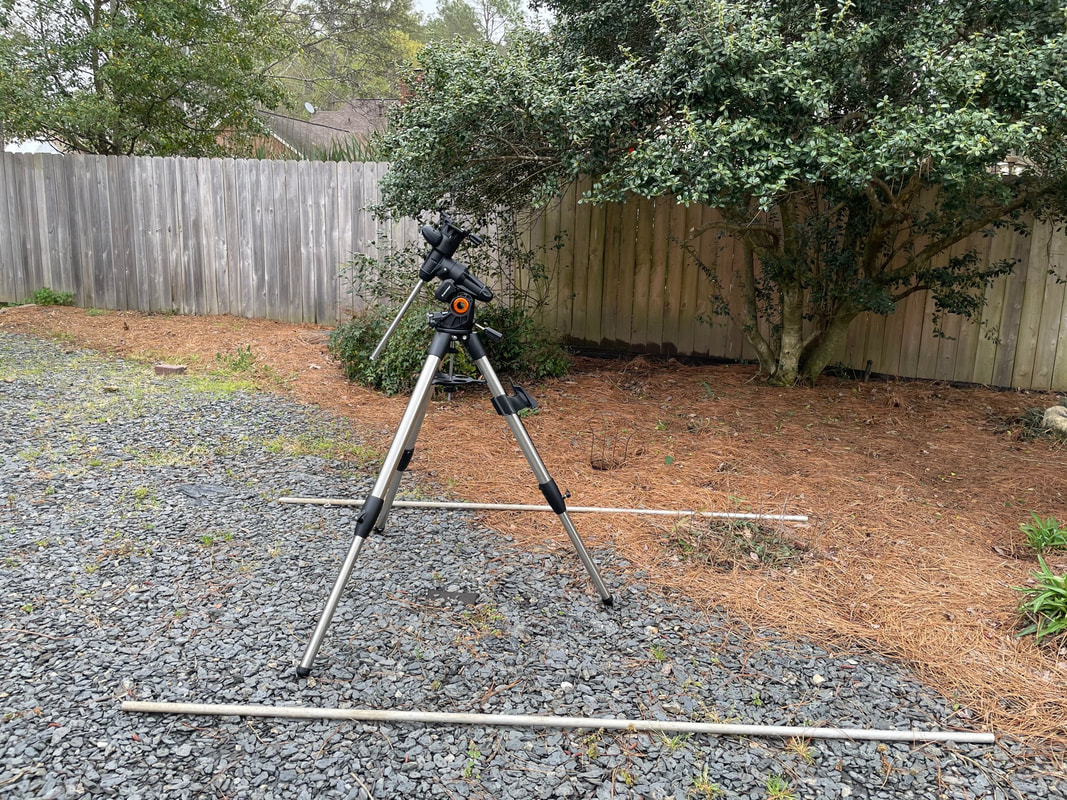 |  |
By April I knew exactly where it would be located and marked the spot with a stake. Some landscaping changes will obviously be required. I also used 4 other stakes and string so that literally “X marks the spot”.

This enabled me to temporarily lift one end of each string and set it aside to dig and then put it back in place to check the center as the hole got deeper and bigger. And then I ran into my first snag. I had a sprinkler system installed in our yard when we built our house 30 years ago, and “sorta” remembered where the pipes may run. I dug slowly at first with a shovel to avoid a close encounter of the wrong kind. Of course, Murphey was right there with me when I began, and my “perfect” location was right next to 2 of my sprinkler pipes. Fortunately, I was able to move my “perfect” spot over 9” and slightly adjust my hole center to avoid them.

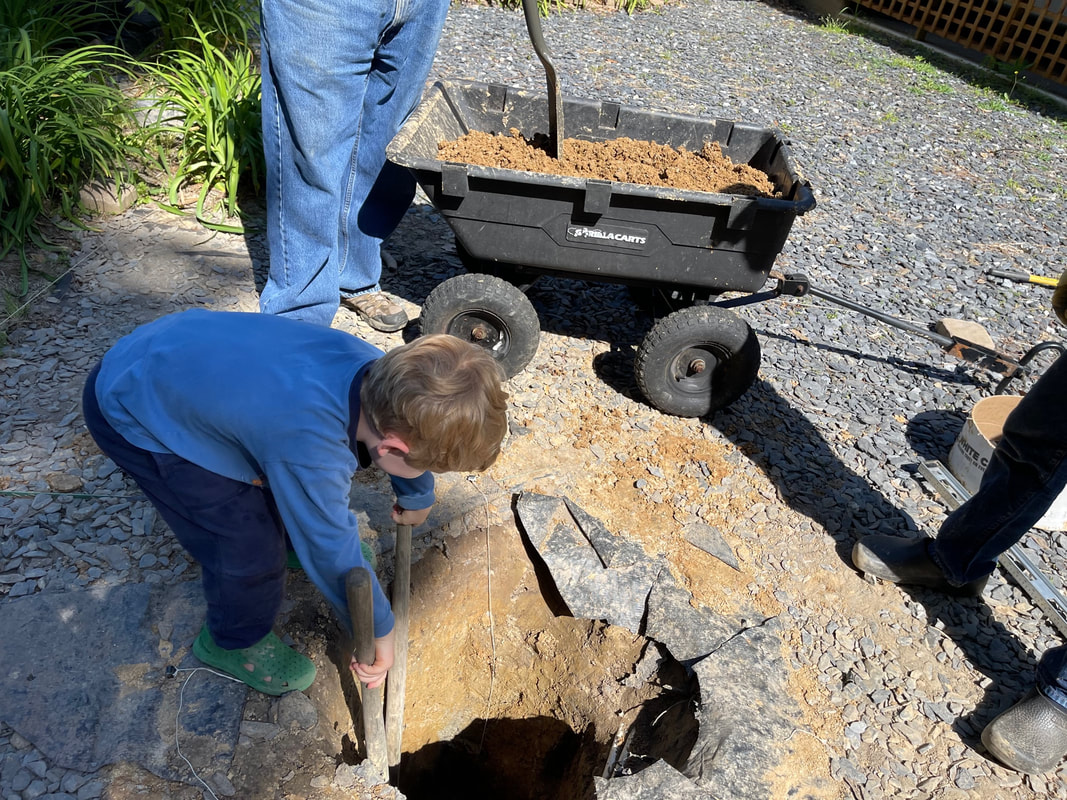
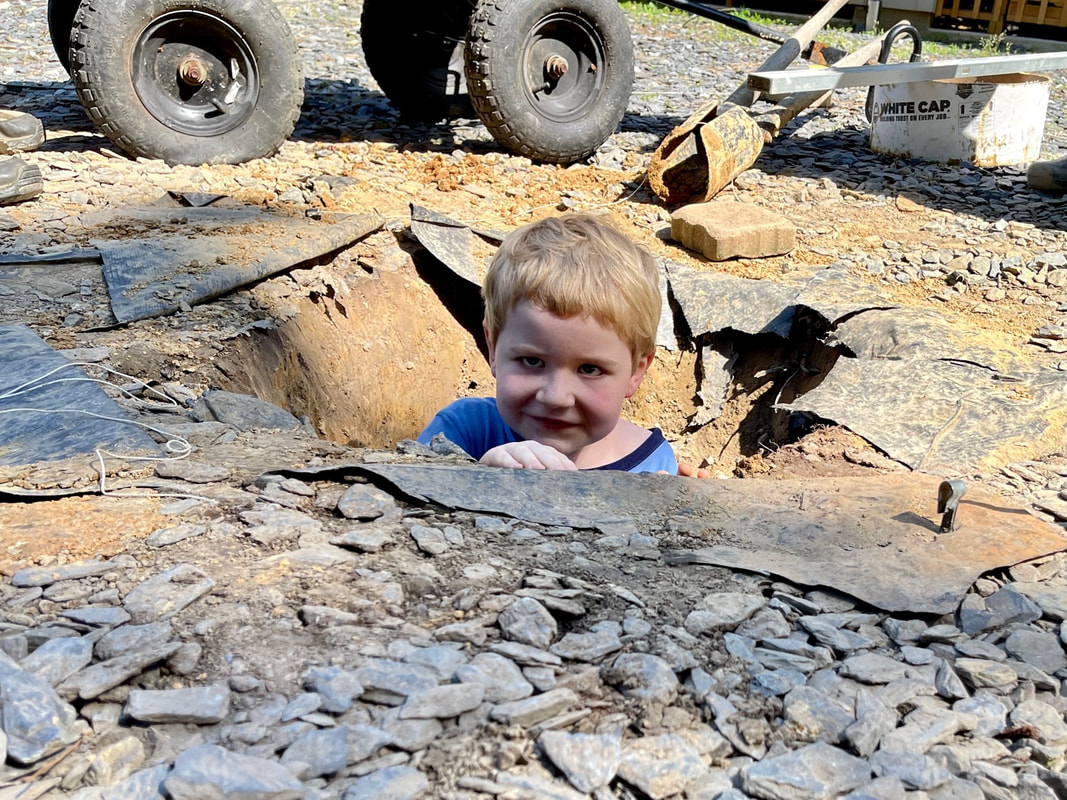
As previously mentioned, I was joined by others (2.5 friends to be exact - Richard, Daniel and Evan). They brought a much needed post hole digger, and we dug until the hole was 3.5’ deep.
 |  |
We lowered our autonomous, self-powered stomper into the hole and let it operate on its own to pack down the bottom of the hole.
 |  |
We put the Sonotube in the hole and completed the concrete pier as described. After I placed the template with the bolts into and on top of the sonotube, I used a level to recheck one last time and was pleased to see our periodic checking while backfilling paid off. It was level! (Note: it does not have to be perfect, there are plenty of adjustments with the metal pier to fine tune the leveling process).

I ran into my next snag the following weekend after I removed the top nuts off the bolts. When I tried to lift the wood template off of the bolts, it wouldn’t budge. I think the wood warped a little from the moisture in the concrete. I had to cut V slots around two of the bolts to free up the wood to remove it.

I used a box cutter to cut a slice down through the cardboard sonatube that was above ground. I was then able to peel the portion of the sonotube off that was above ground. I put the nuts and washers back onto the bolts and used a level on top of two washers at a time to adjust the nuts until they were all level.
The next morning, with a little help from friends again (Daniel and Michelle), we successfully lifted the metal pier (without the cap) onto the bolts of the concrete pier.
The next morning, with a little help from friends again (Daniel and Michelle), we successfully lifted the metal pier (without the cap) onto the bolts of the concrete pier.

With a level across the top of the metal pier, I adjusted the lower nuts until the metal pier was level and then put the top nuts on and tightened them down.
 |  |
There is a hole in the bottom of the metal pier that needs to be taped over so the sand that is poured into it does not leak out. The metal pier is 3’ high & my arm is not that long. How do you do that? See below…

No, that is not a worm hole into another galaxy.
I put black duct tape onto the end of my long level with the ends turned slightly up to stick to the end of the level. I then lowered the level into the metal pier, carefully held it above the hole in the bottom, then lowered it and pressed down. I gently lifted the level upward and the tape stayed in place stuck to the bottom of the metal pier over the hole as seen in the above picture. I repeated with a second piece of tape just to make sure the hole was covered.
I then filled the metal pier with sand and put the metal cap on top of the pier with the AVX “doughnut” adapter bolted on as previously described.
Then came my next hmmmm. The instructions say to remove the North peg from your AVX tripod and screw it into the doughnut adapter, but the hole threads did not match. I went to the hardware store and bought a 1” bolt with the correct thread and a round head to use instead. This turned out to work well, and I placed the North peg back into my AVX tripod for use when I want to take the mount and tripod with me on a trip.
 |  |
Now I was ready to bolt the mount onto the adapter. When I tried to put the AVX mount onto the adapter I ran into my next uh-oh. When resting the AVX mount onto the doughnut adapter in my garage earlier, I did not have the altitude adjustment knob screwed into the mount. Now I found my long AVX altitude bolt handle hit the metal pier when I tried to bolt it in place. So, I cut half of the plastic handle off and was able to bolt the mount down and still grip the remaining portion of the plastic end of the altitude bolt enough to make adjustments when needed. It just clears the top plate of the metal pier and works fine.
 |  |
I adjusted the bolts of the cap to provide a 2.5” distance between them as recommended in the instructions. These bolts can also be used to fine tune leveling of the top plate.
I was finally ready to put my equipment in place and wait for the evening for the test drive.
When it was close to dark, I looked through the polar scope of the AVX mount and was pleased to see my friend Polaris clearly in view as I had tested many times earlier in the year! It was enough above the top of the garage to accommodate the circle of possible positions of Polaris. (Note: view is reversed - up is down & left is right). I use an app on my phone to determine the current position of Polaris on the circle around the North Celestial Pole (I don’t use the Polaris and constellation markings of the Polar scope). I used the mount adjustment knobs until Polaris was at the proper position on the circle as indicated by the app.

I will do a more precise polar align later using my StarSense All-Star polar align (or other techniques). I should not have to look at Polaris again through the Polar scope until I remove the mount for use on a trip or change mounts.
My location planning paid off and I even avoided a pesky tree limb as well (I may have to cut if off some day).
My location planning paid off and I even avoided a pesky tree limb as well (I may have to cut if off some day).
 RSS Feed